- Published on
Modular Monolith - Simplifying the Inner Development Loop with .NET Aspire
11 min read- Authors

- Name
- Daniel Mackay
- @daniel_mackay

- Introduction
- What is .NET Aspire?
- What is it NOT?
- Inner Development Loop
- Observability
- Integrations
- Deployment
- What's new in Aspire for .NET 9?
- Conclusion
Series
This post is part of a Modular Monolith series, in which we'll dive into the many facets associated with the architecture.
- Part 1: Modular Monoliths - A Gentle Introduction
- Part 2: Modular Monoliths - Implementation Deep Dive
- Part 3: Modular Monoliths - Simplifying the Inner Dev Loop with .NET Aspire
- Part 4: Coming Soon
Introduction
In the previous post, we looked at the nuts and bolts of how to implement a Modular Monolith Architecture (MMA). In this post, we cover how we can streamline our inner development loop with .NET Aspire.
Overview
Getting started with a new project can be a daunting task. There are so many things to set up and configure, and it can be hard to know where to start. On a medium sized project, there might be applications for both the front-end and back-end, a database, plus other infrastructure. Each of these need to be set up and configured correctly, so they can communicate together. This can be a mannual and error prone process.
This is especially true when working with a modular monolith architecture, where you have multiple modules that most likely have their own databases and infrastructure.
Regardless of how complex the project is, the golden standard is to always be able to pull the code from the repository, run a single command, and have the project up and running on your local machine.
What is .NET Aspire?
.NET Aspire is not one thing. I like to describe it as tooling that helps us to build, debug and deploy distributed systems. I used to have he opinion that Aspire was only good for Microservices. However, I've now come to the conclusion that it's useful for any .NET application that has more than one 'moving part'. This is especially true for Modular Monoliths.
'Moving parts' include:
- Applications
- UI Frontends
- API Backends
- Background Processes
- Microservices
- Infrastructure
- Database
- File Storage
- Cache
- Message Queue
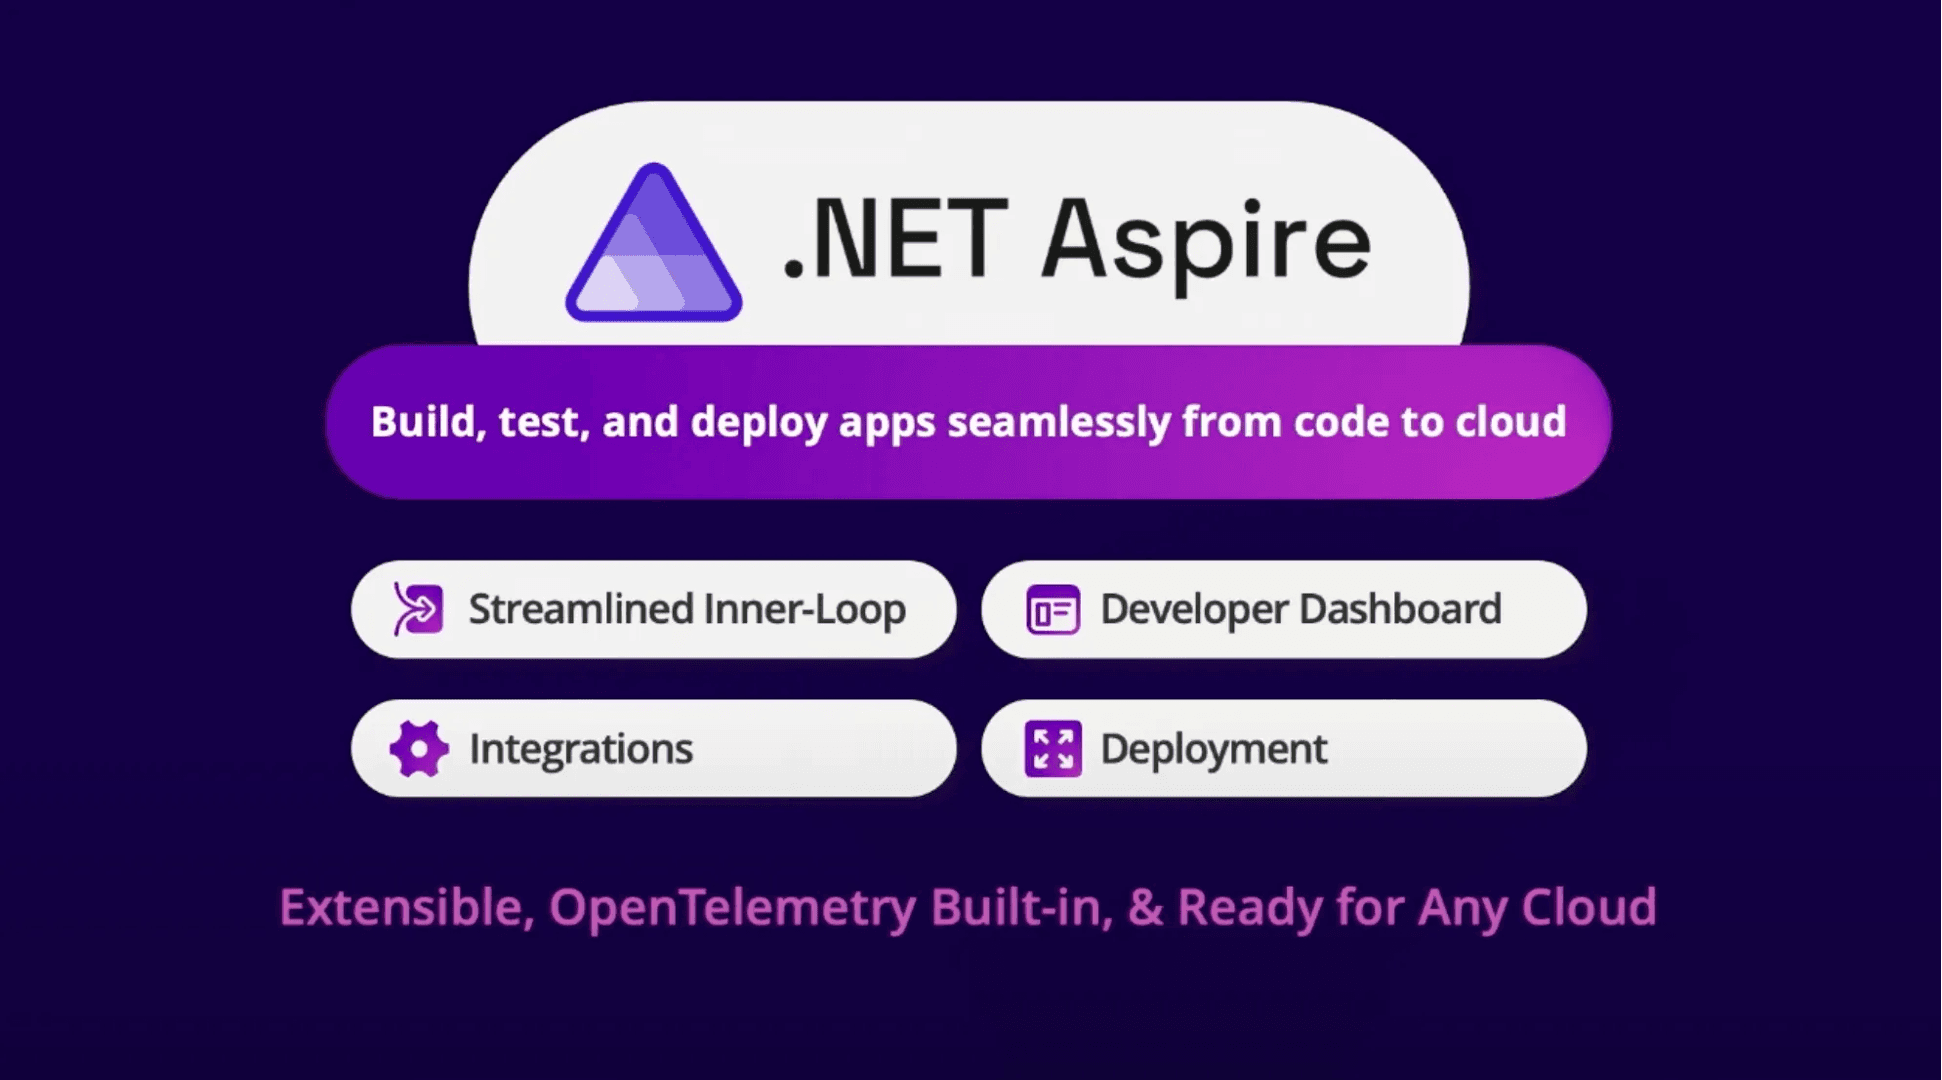
Microsoft advertise Aspire as being built on top of 4 pillars:
- Streamlined Inner Development Loop: C# App Host, helps you to get up and running quickly, by providing a way to start and stop resources, run commands on resources, and wait for resources to be ready.
- Integrations: Aspire provides a way to integrate with other infrastructure (via pre-configured NuGet packages), such as docker containers. The Aspire client integrations (e.g.
Aspire.Microsoft.EntityFrameworkCore.SqlServer) configure defaults to provide observability, resiliency, and scalability. - Developer Dashboard: Observability how your app is running via Open Telemetry metrics, traces, and logs
- Deployment: Easily provision cloud resources and deploy your app via the Azure Developer Cli (
azd)
What is it NOT?
- A new version of .NET (e.g. Framework / Core)
- An application framework (e.g. ASP.NET Core, MAUI, WPF)
- Something that's deployed
NOTE: While the App Host is not deployed, client Integrations become part of your app. Service defaults becomes part of your app, so both of these ARE deployed. Dashboard can also optionally be deployed.
Inner Development Loop
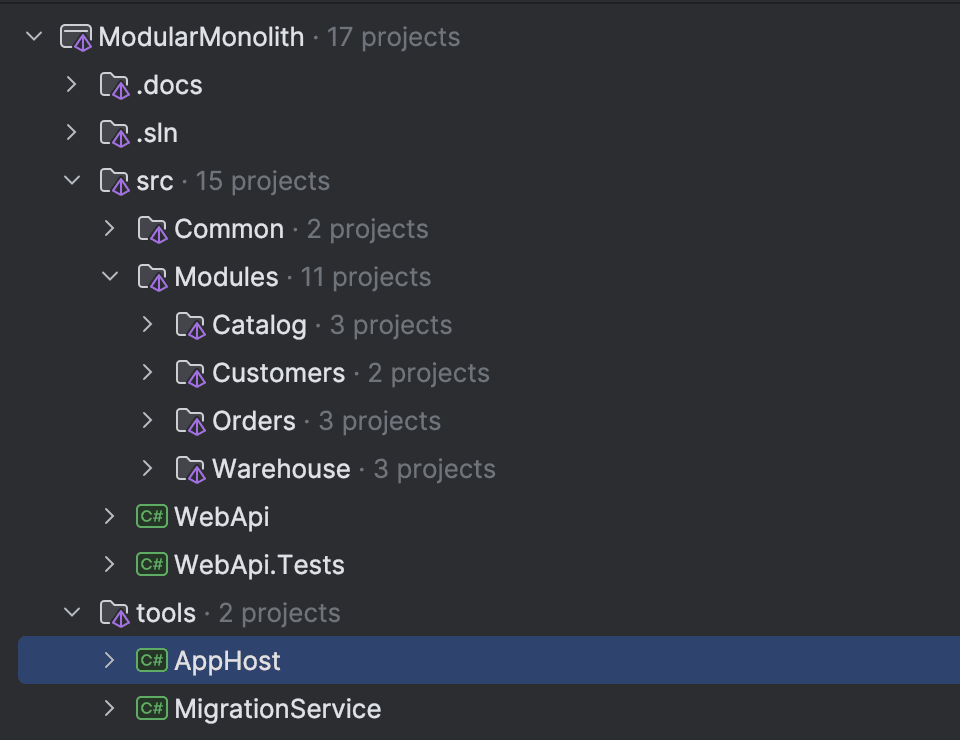
The C# AppHost is at the heart of .NET Aspire. It becomes the single entry point to run our application and orchestrates all projects and resources needed.
In a Modular Monolith, I like to put this in a tools directory:
In my Modular Monolith, Program.cs in the AppHost looks like this:
var builder = DistributedApplication.CreateBuilder();

var sqlServer = builder
    .AddSqlServer("sql")
    .WithLifetime(ContainerLifetime.Persistent);

var warehouseDb = sqlServer.AddDatabase("warehouse");
var catalogDb = sqlServer.AddDatabase("catalog");
var customersDb = sqlServer.AddDatabase("customers");
var ordersDb = sqlServer.AddDatabase("orders");

var migrationService = builder.AddProject<MigrationService>("migrations")
    .WithReference(warehouseDb)
    .WithReference(catalogDb)
    .WithReference(customersDb)
    .WithReference(ordersDb)
    .WaitFor(sqlServer);

builder
    .AddProject<WebApi>("api")
    .WithExternalHttpEndpoints()
    .WithReference(warehouseDb)
    .WithReference(catalogDb)
    .WithReference(customersDb)
    .WithReference(ordersDb)
    .WaitForCompletion(migrationService);

builder
    .Build()
    .Run();
In this example above you can see we are setting up a single SQL Server, with 4 databases. Notice the use of WithLifetime(ContainerLifetime.Persistent) which configures our container to stick around between restarts. This hugely speeds up our inner dev loop.
Next we have the MigrationService project, which is responsible for running database migrations. This will create the schema for all databases, and seed them with test data. The call to WaitFor(sqlServer) is important, as it tells the MigrationService to wait for the SQL Server to be ready before running. We are also passing in references to all databases. As Aspire is creating the SQL Server with a random port, the connection string will be different each time. By passing in the reference to the database, the MigrationService can easily get the connection string from the database without any manual configuration. Nice! 😎
Finally, we have the WebApi project, which is our main application. We are telling it to wait for the MigrationService to have completed before starting so that we can ensure our database is in a ready state.
It's also common to add other infrastructure resources such as caches, message queues, and file storage.
Observability
Once we have our application up and running, the next step is to test and observe how it's running. Aspire provides a developer dashboard that gives us insights into how our application is running. This includes metrics, traces, and logs.
The dashboard is accessible via a web browser, and can be run locally or deployed to the cloud:
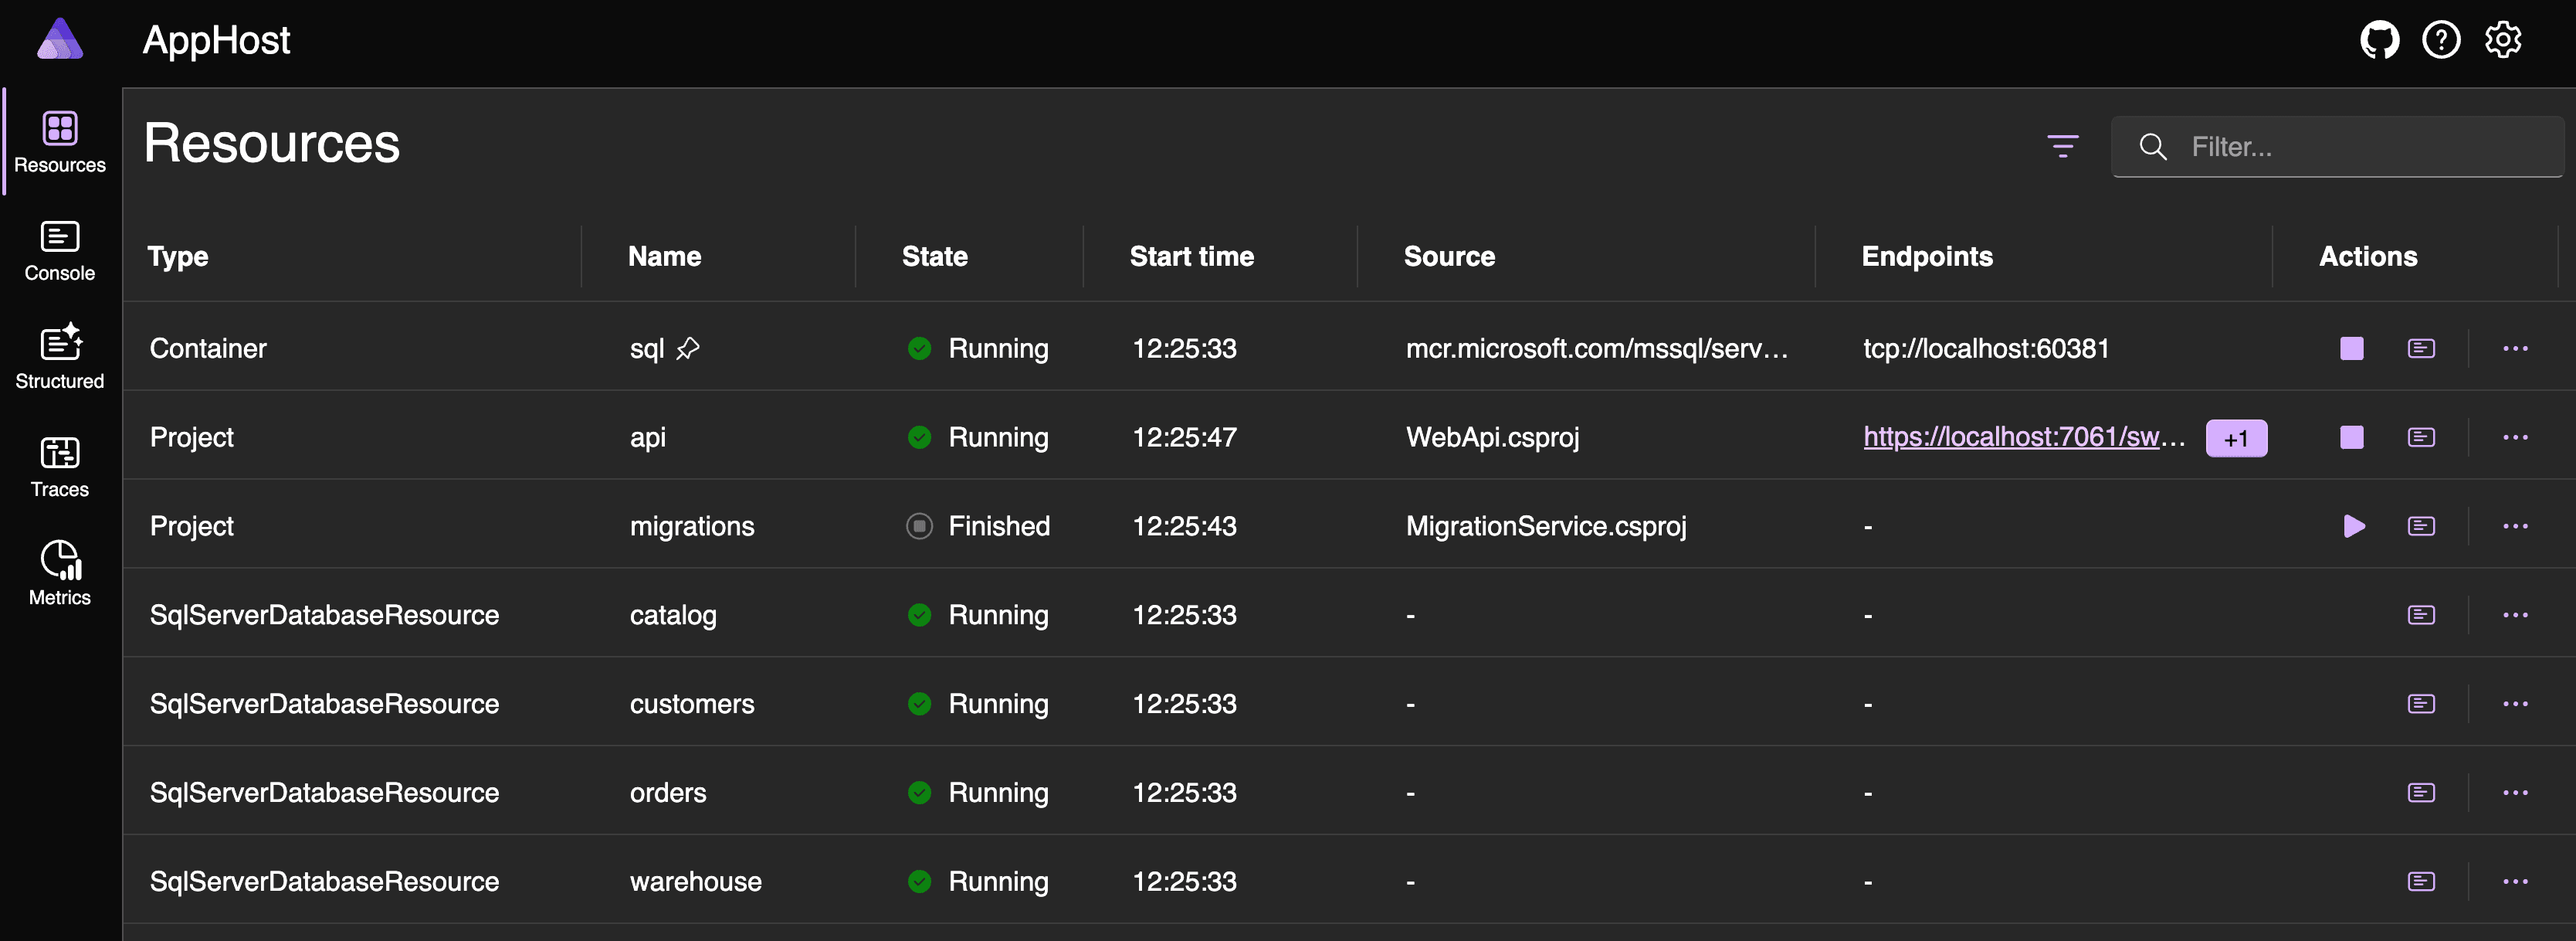
The resources tab shows us all of our services. These could be projects that we are maintaining or docker images. For our database, you will see we have a container named 'sql' and four database resources that are attached to it (the attachments are not shown). From here we can browse our application (UI or API), restart the resource, or navigate to the console logs.
The console logs are particularly useful for debugging. They show us the output of the console for each resource.
The screenshot below shows the console logs for the MigrationService project. You can see that it's running the migrations for the warehouse database.
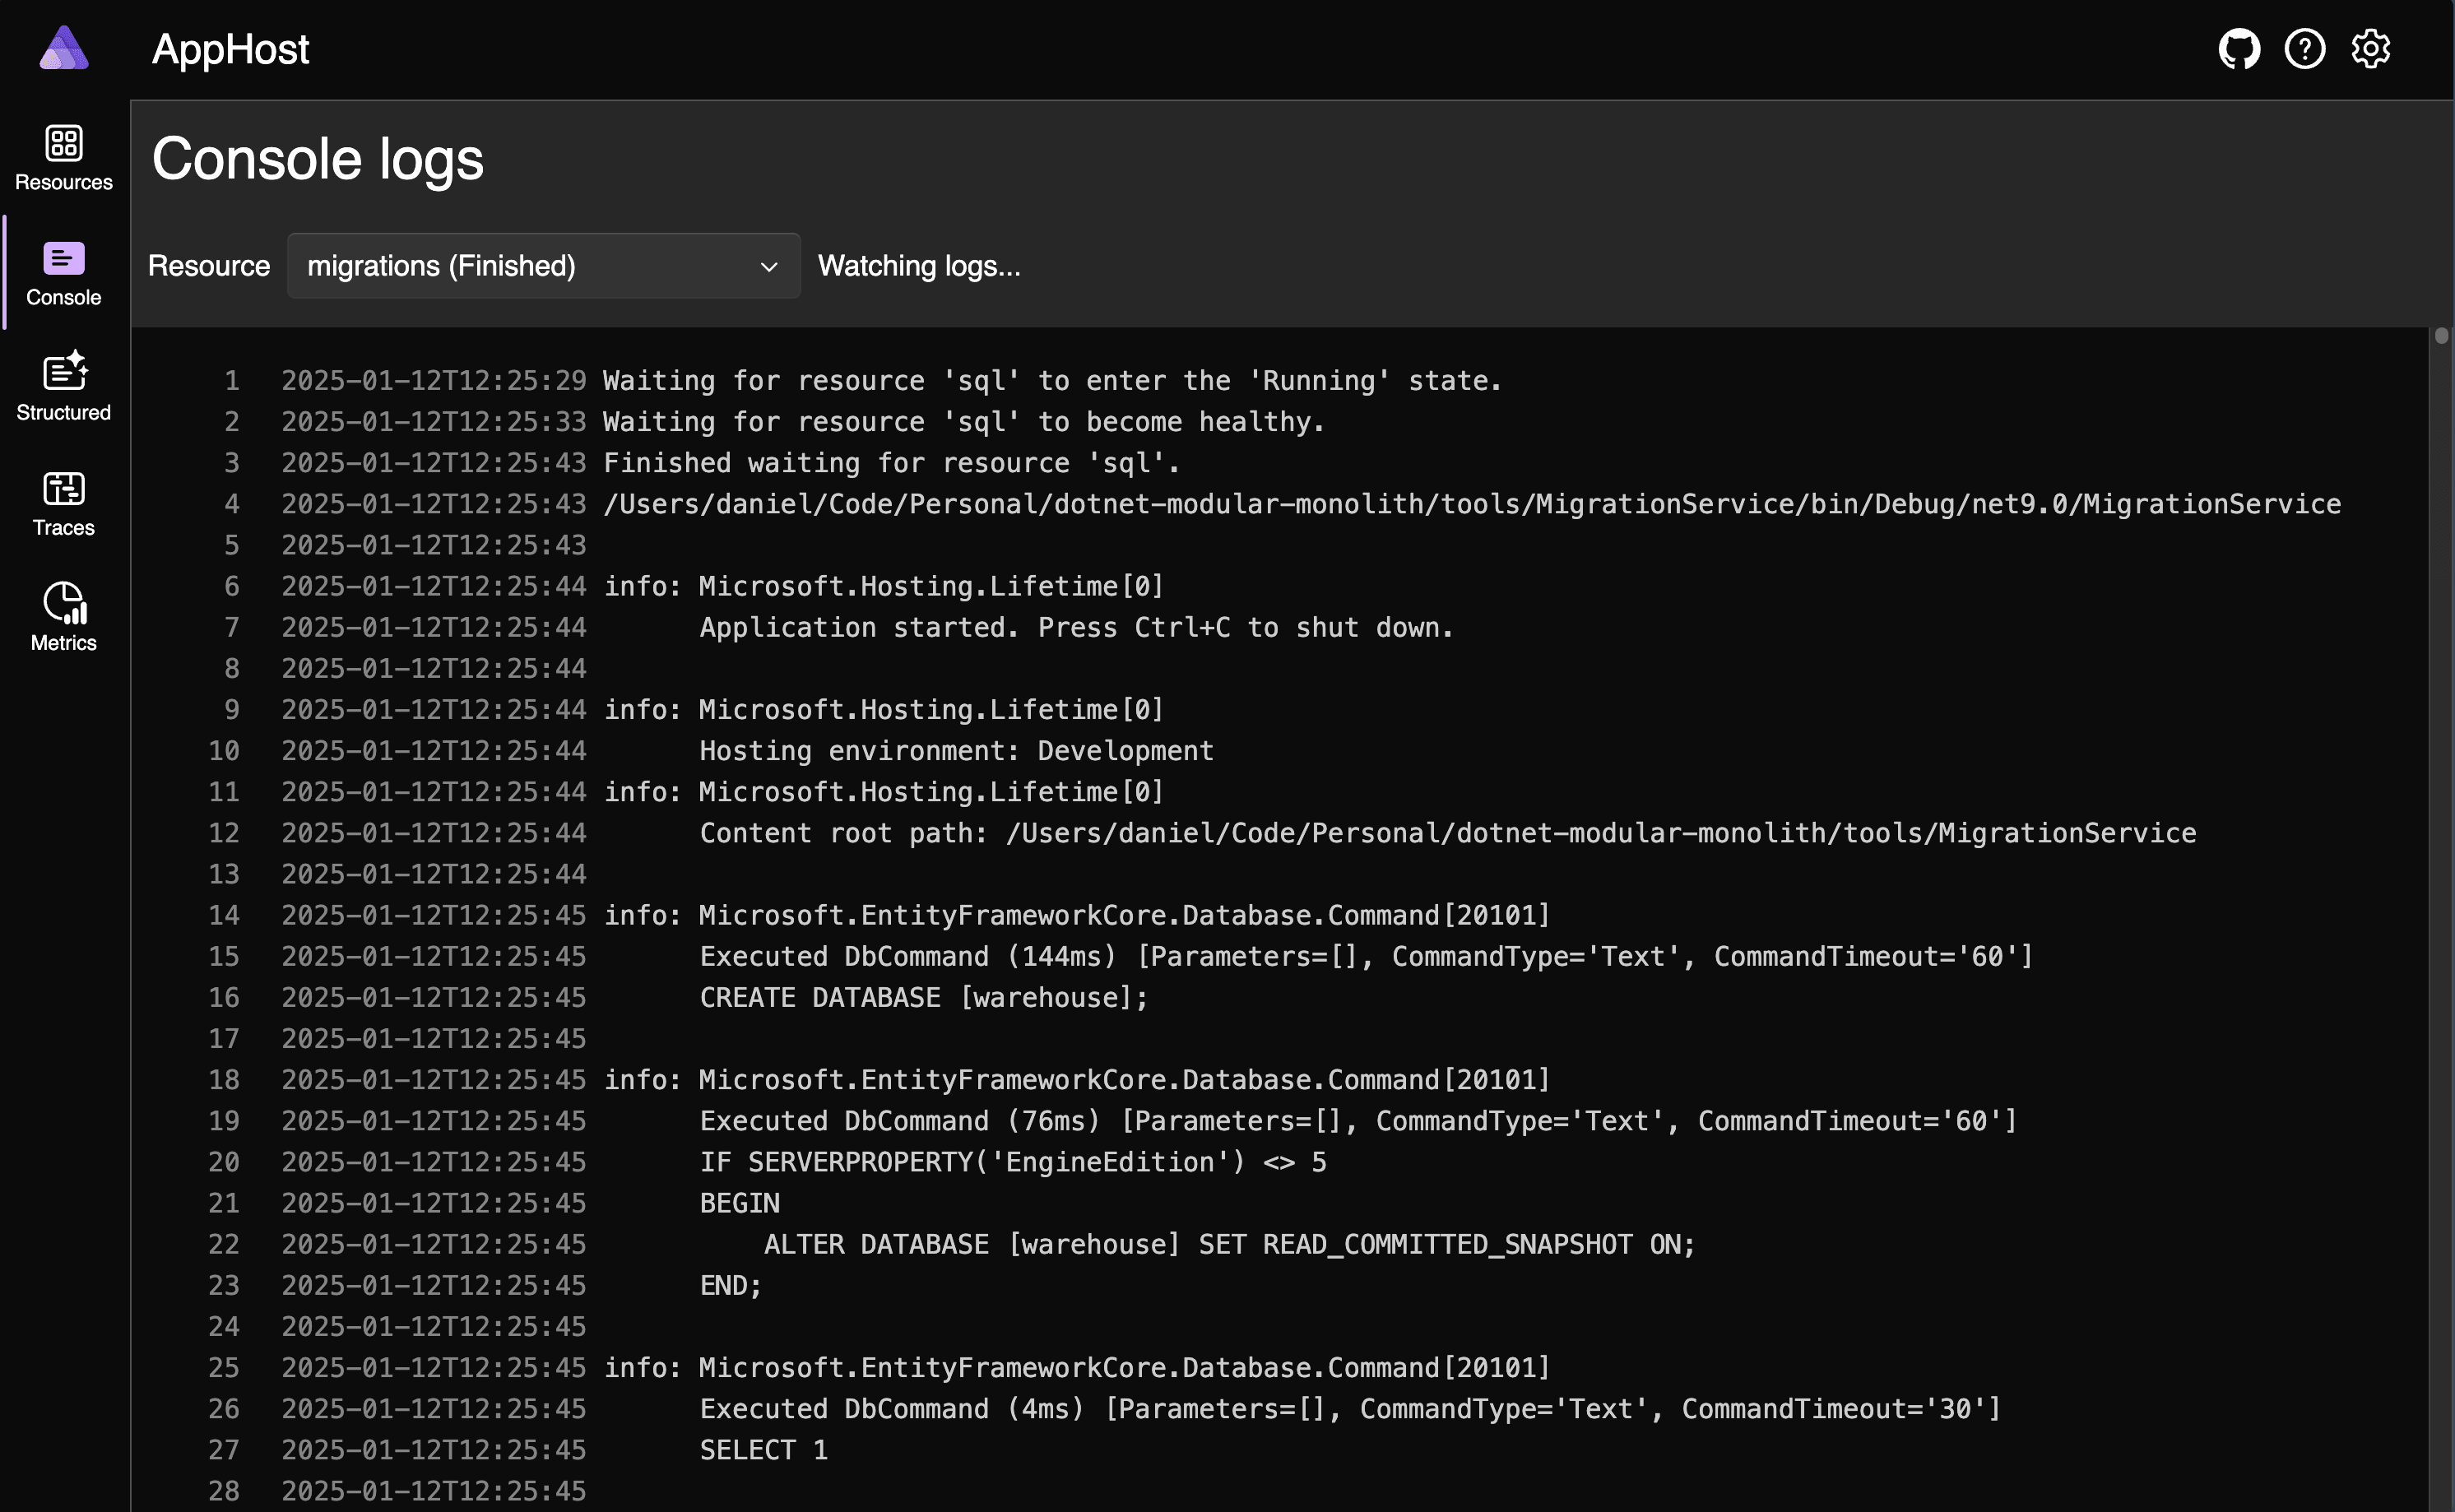
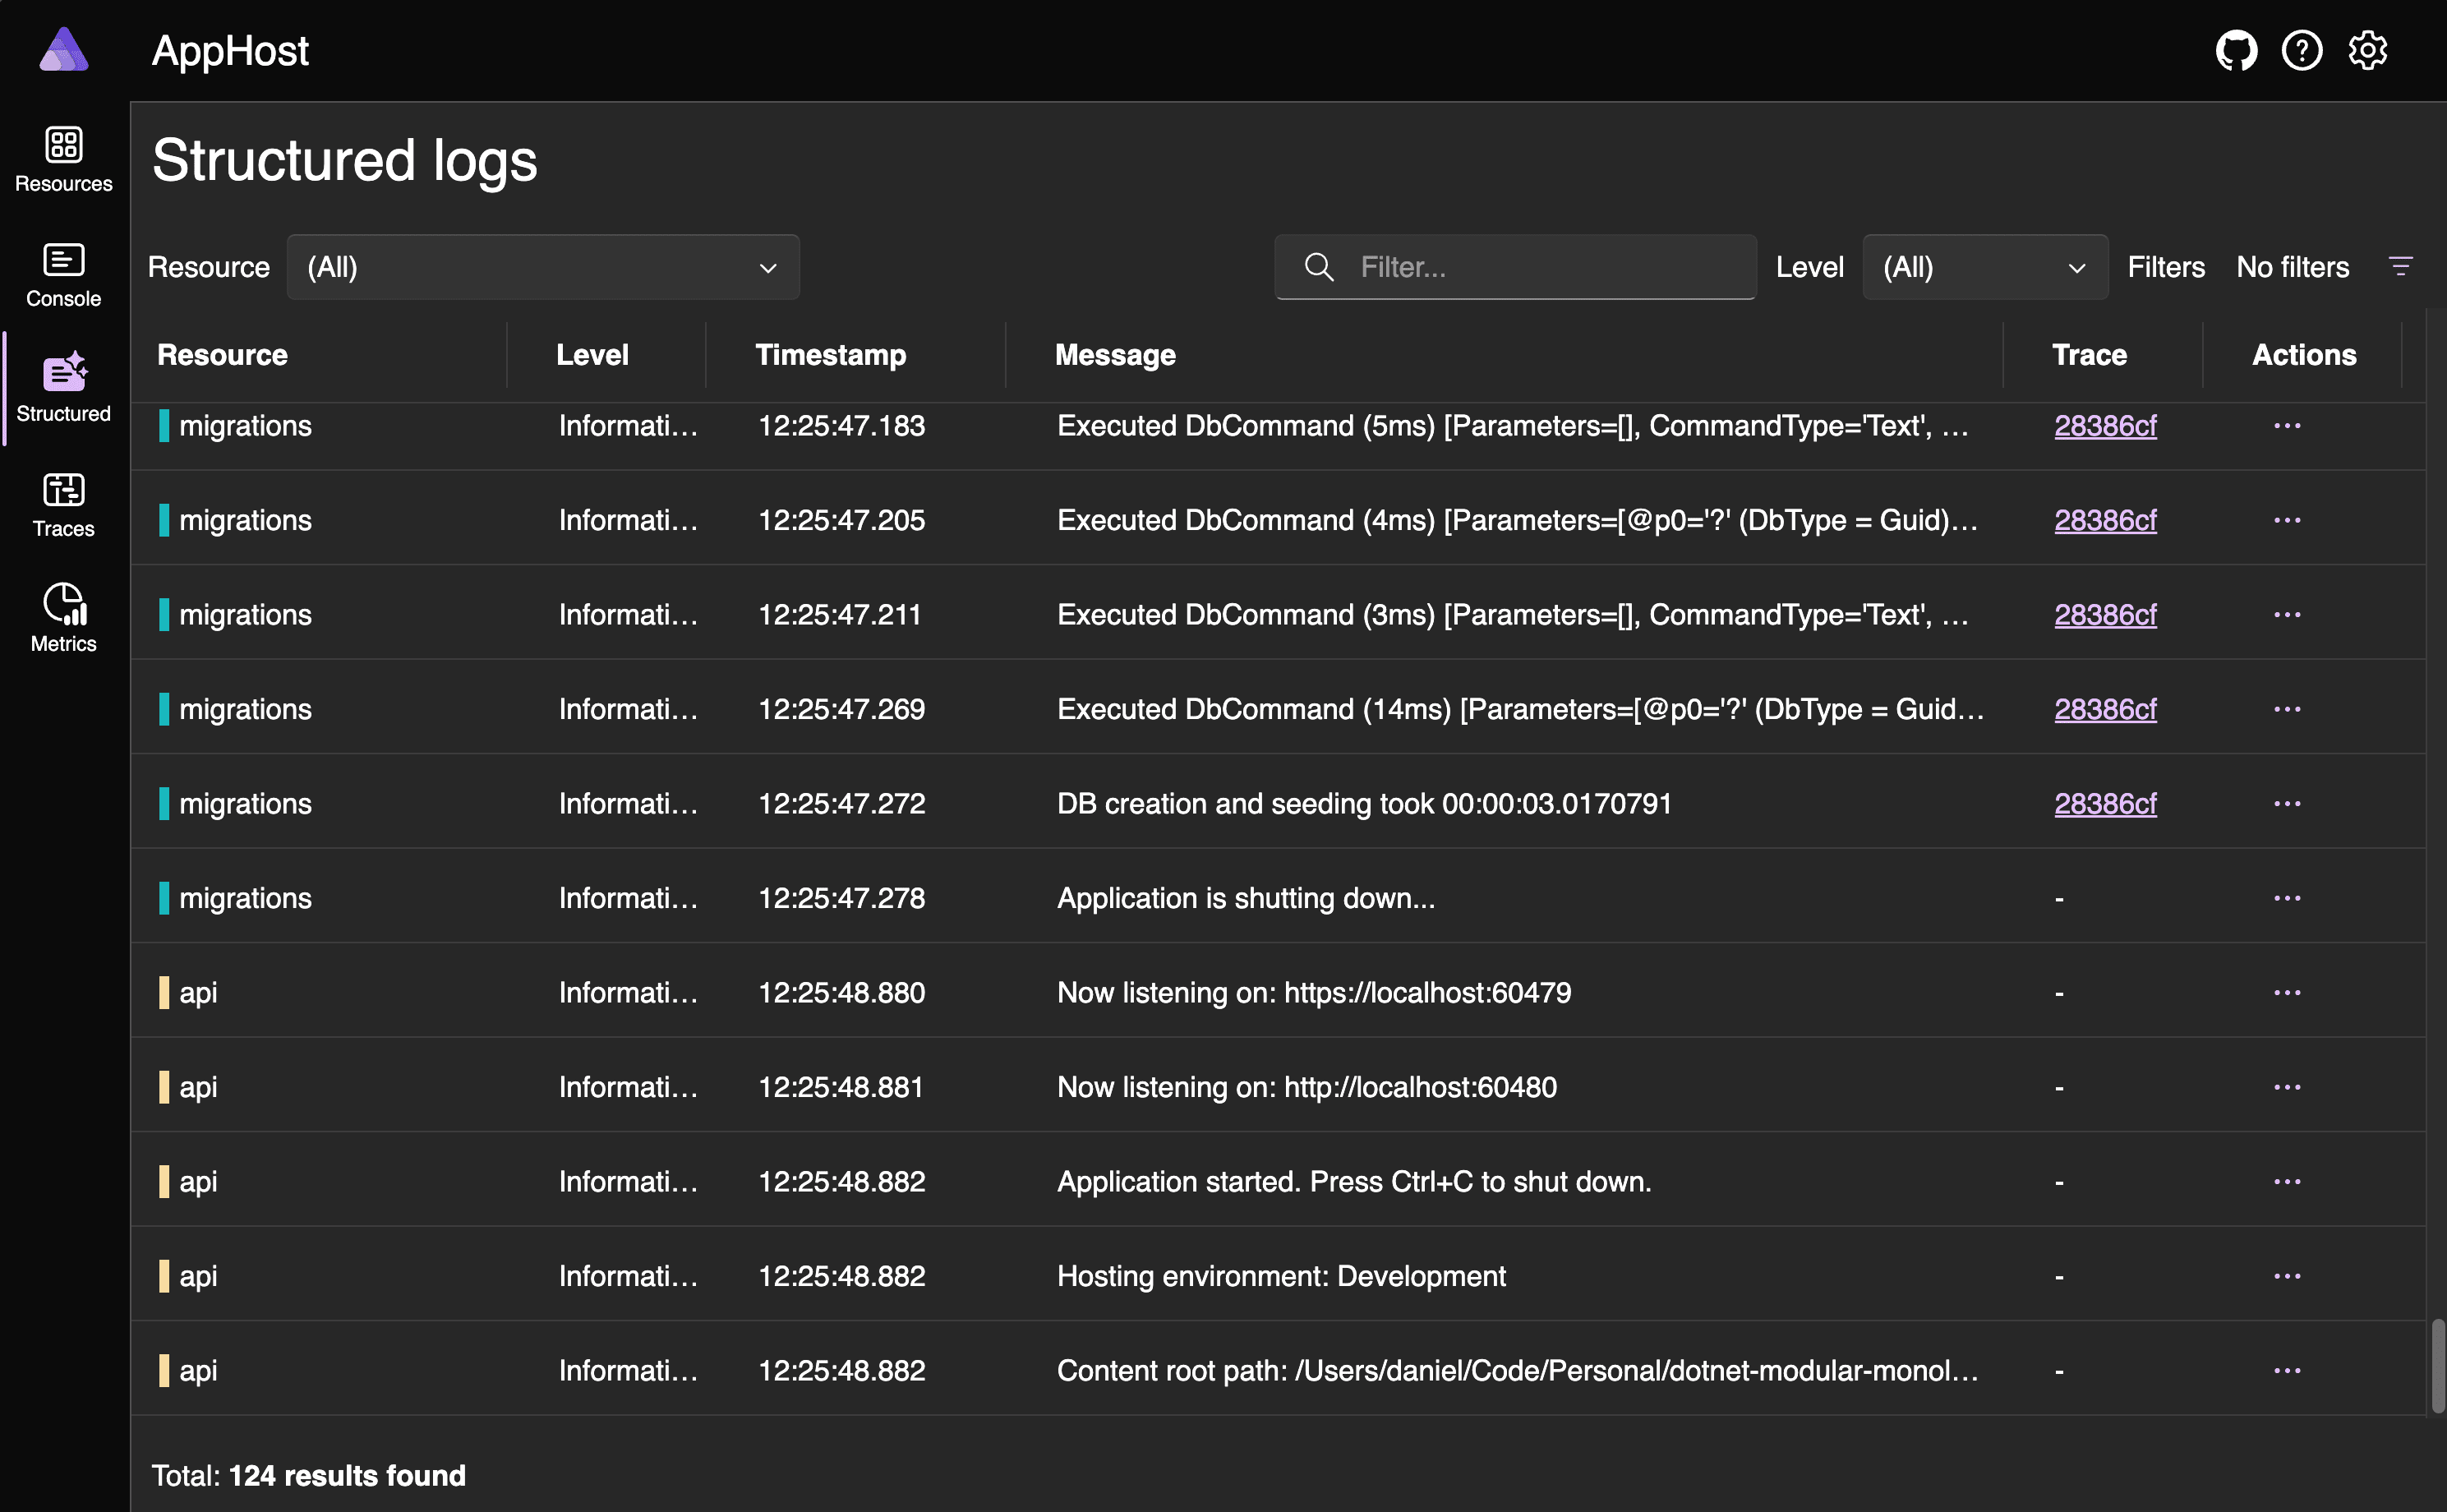
The structured logs shows the same data as the console logs, but in a more structured format. This is useful for filtering and searching. If you've ever used Serilog or Seq, you'll be familiar with this format.
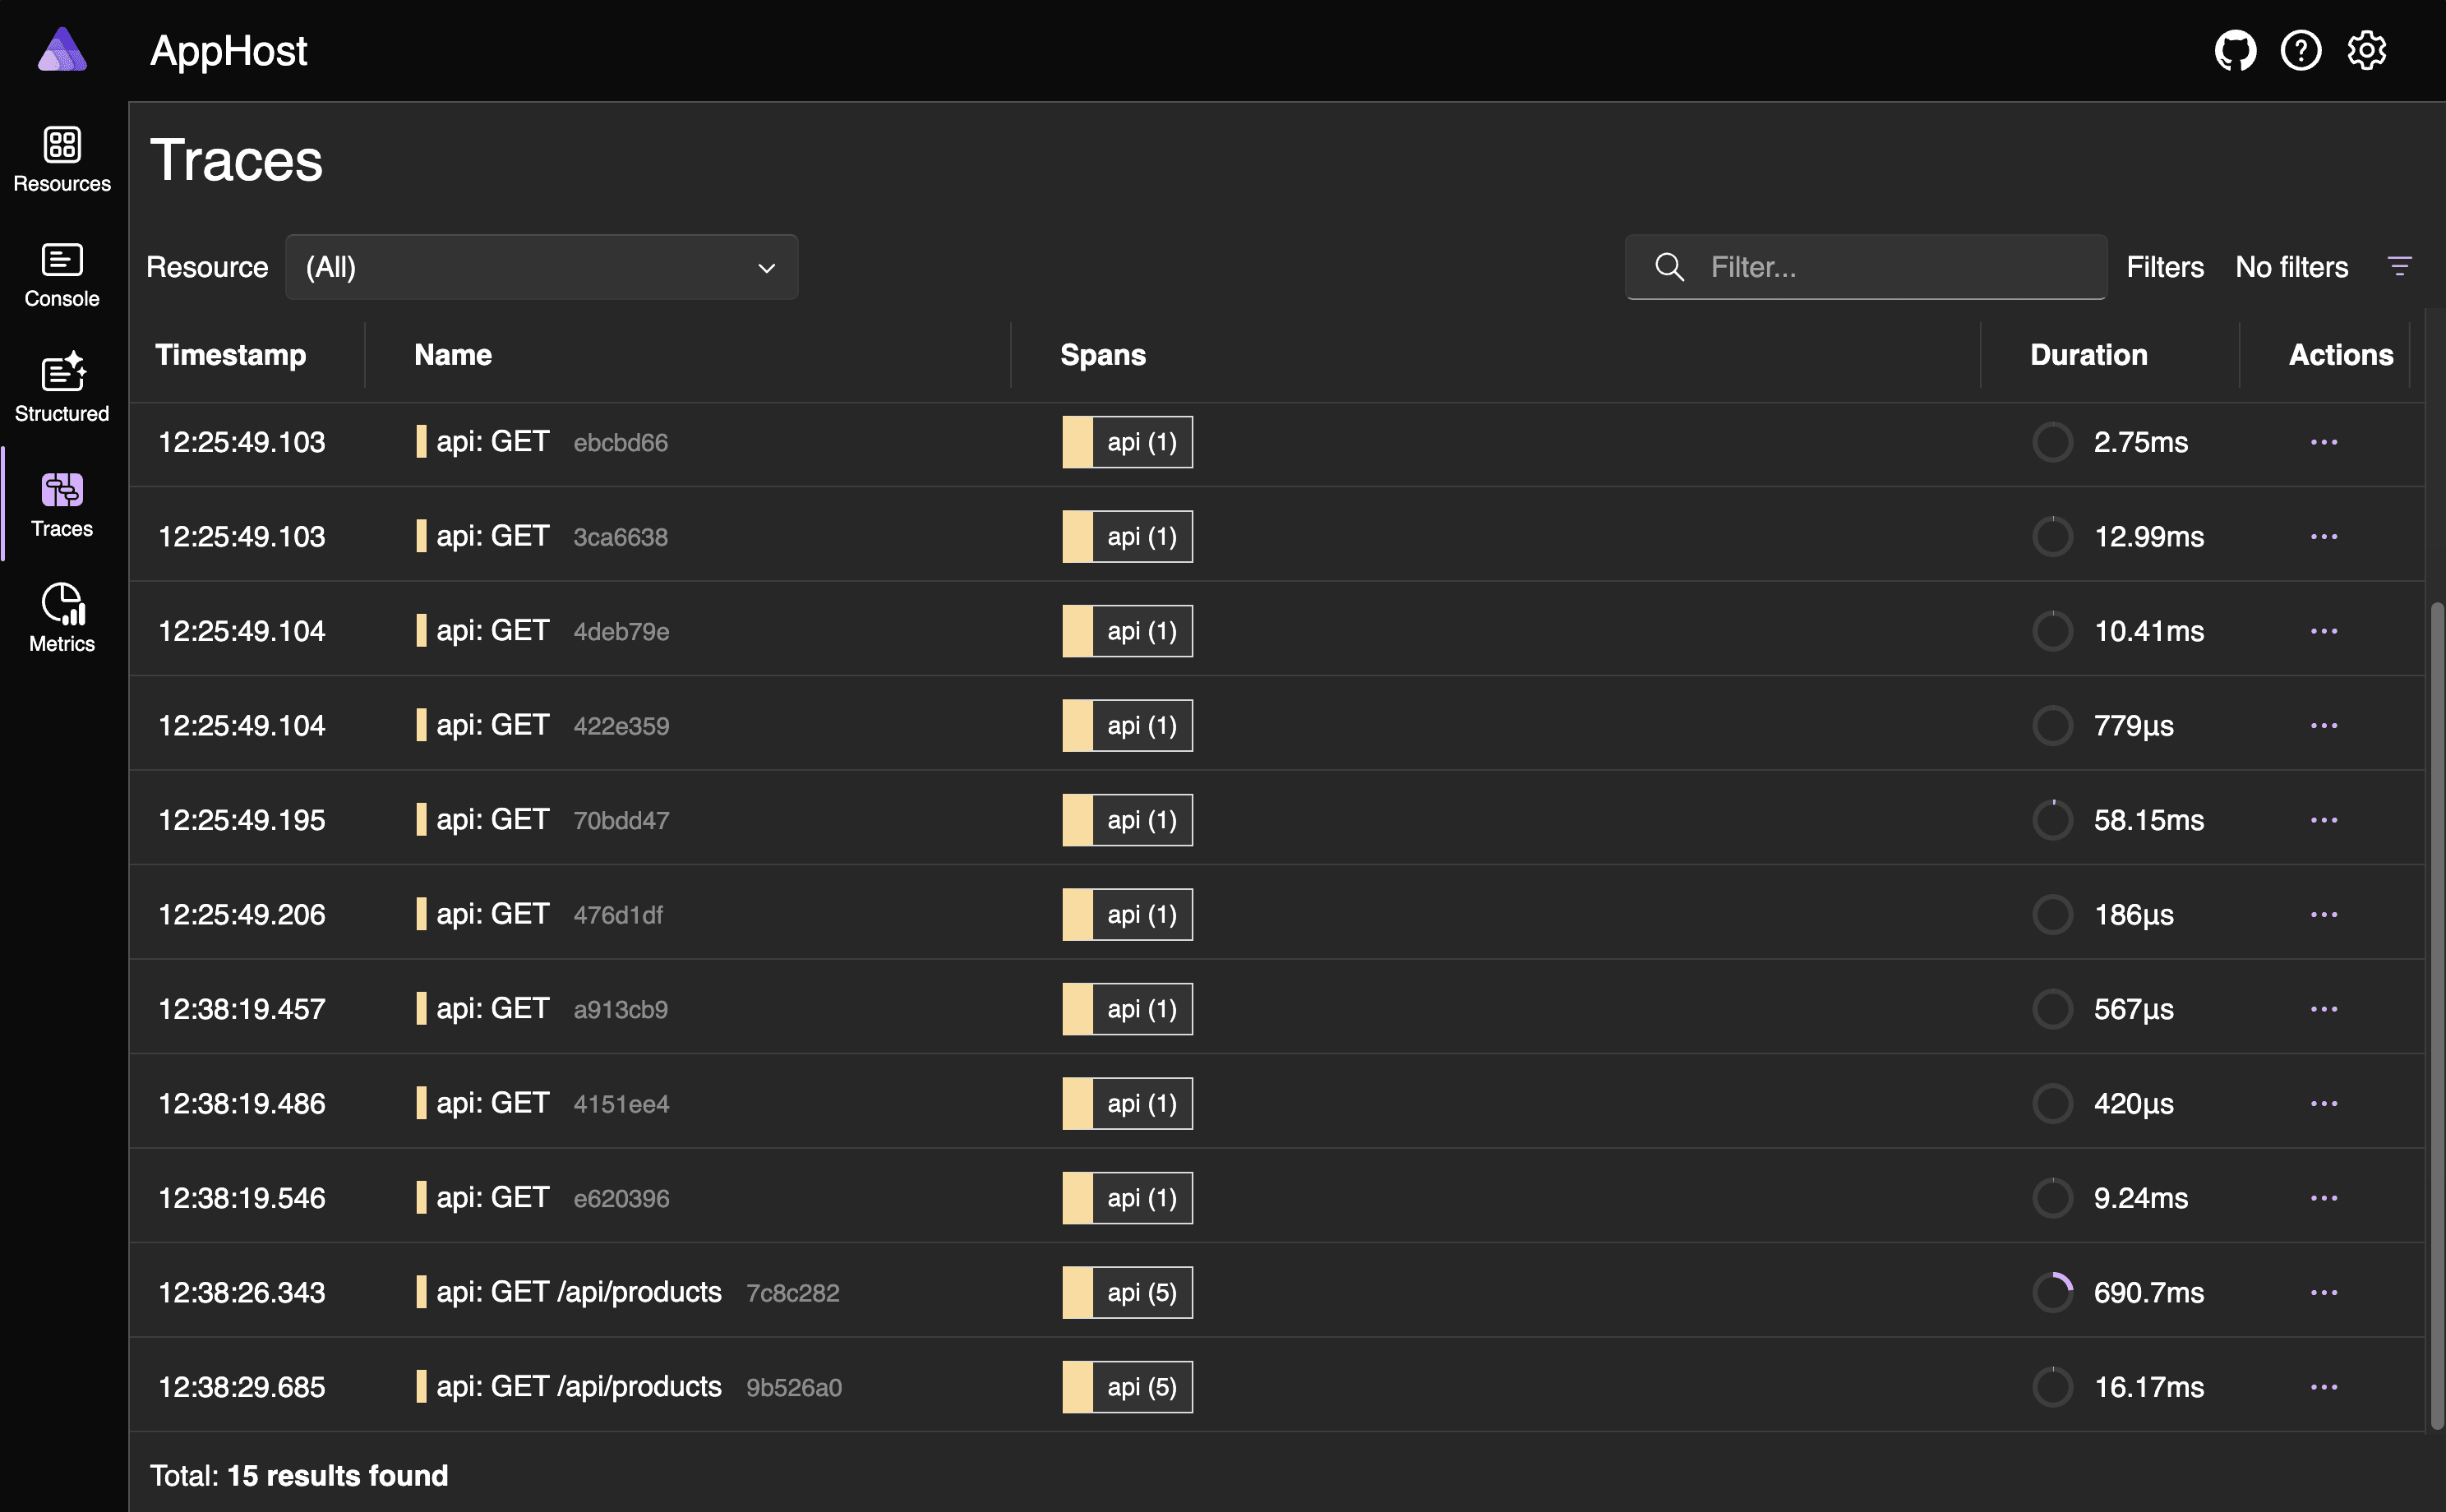
Traces allows us to see the flow of a request through our application. This is useful for debugging performance issues, or for understanding how our application is working.
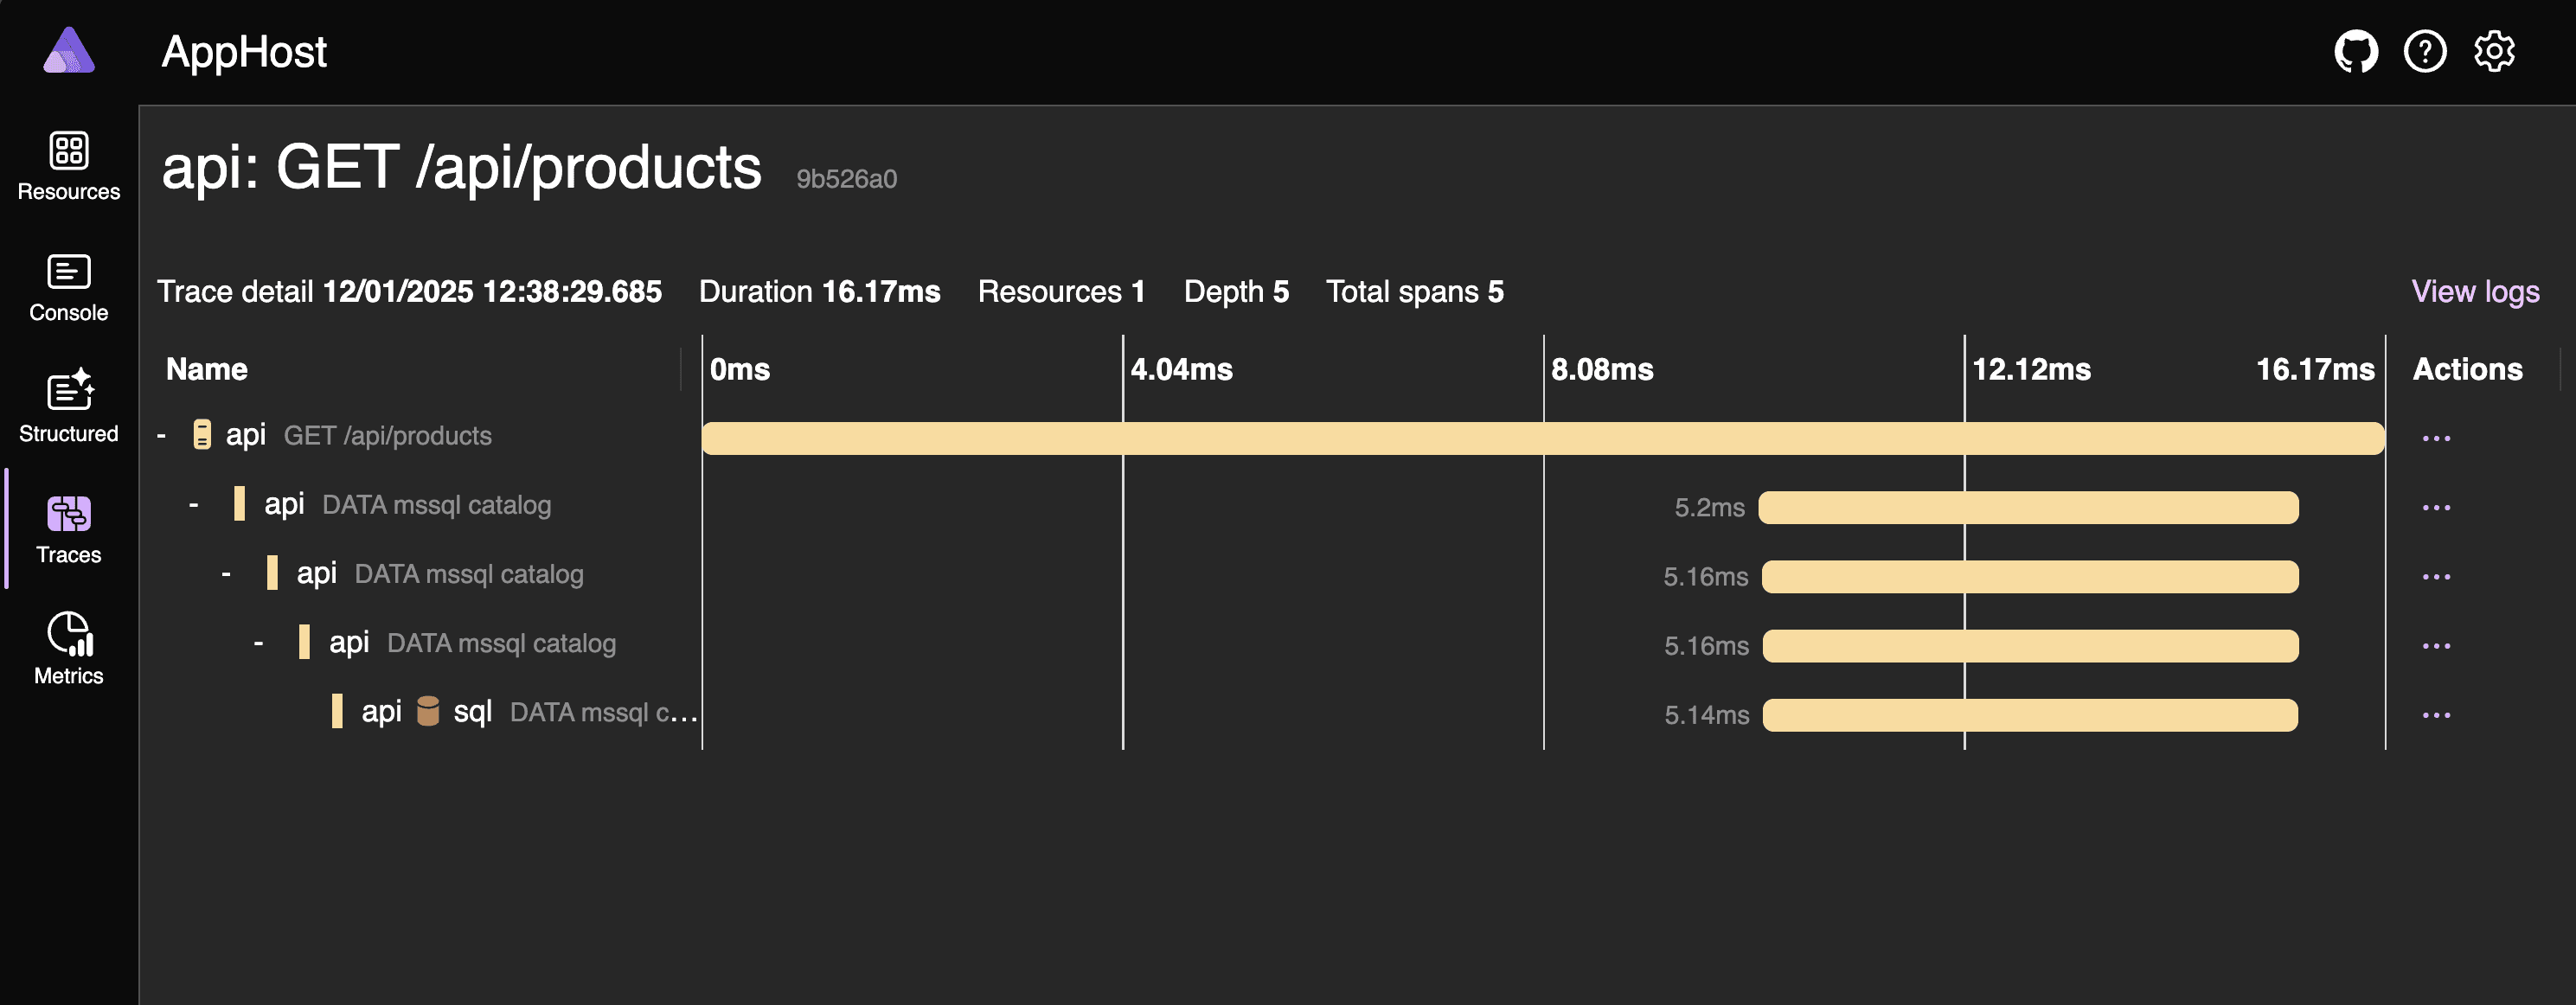
We can drill into a specific trace to get a detailed breakdown of what happened. This includes the duration of each step, and any logs that were generated.
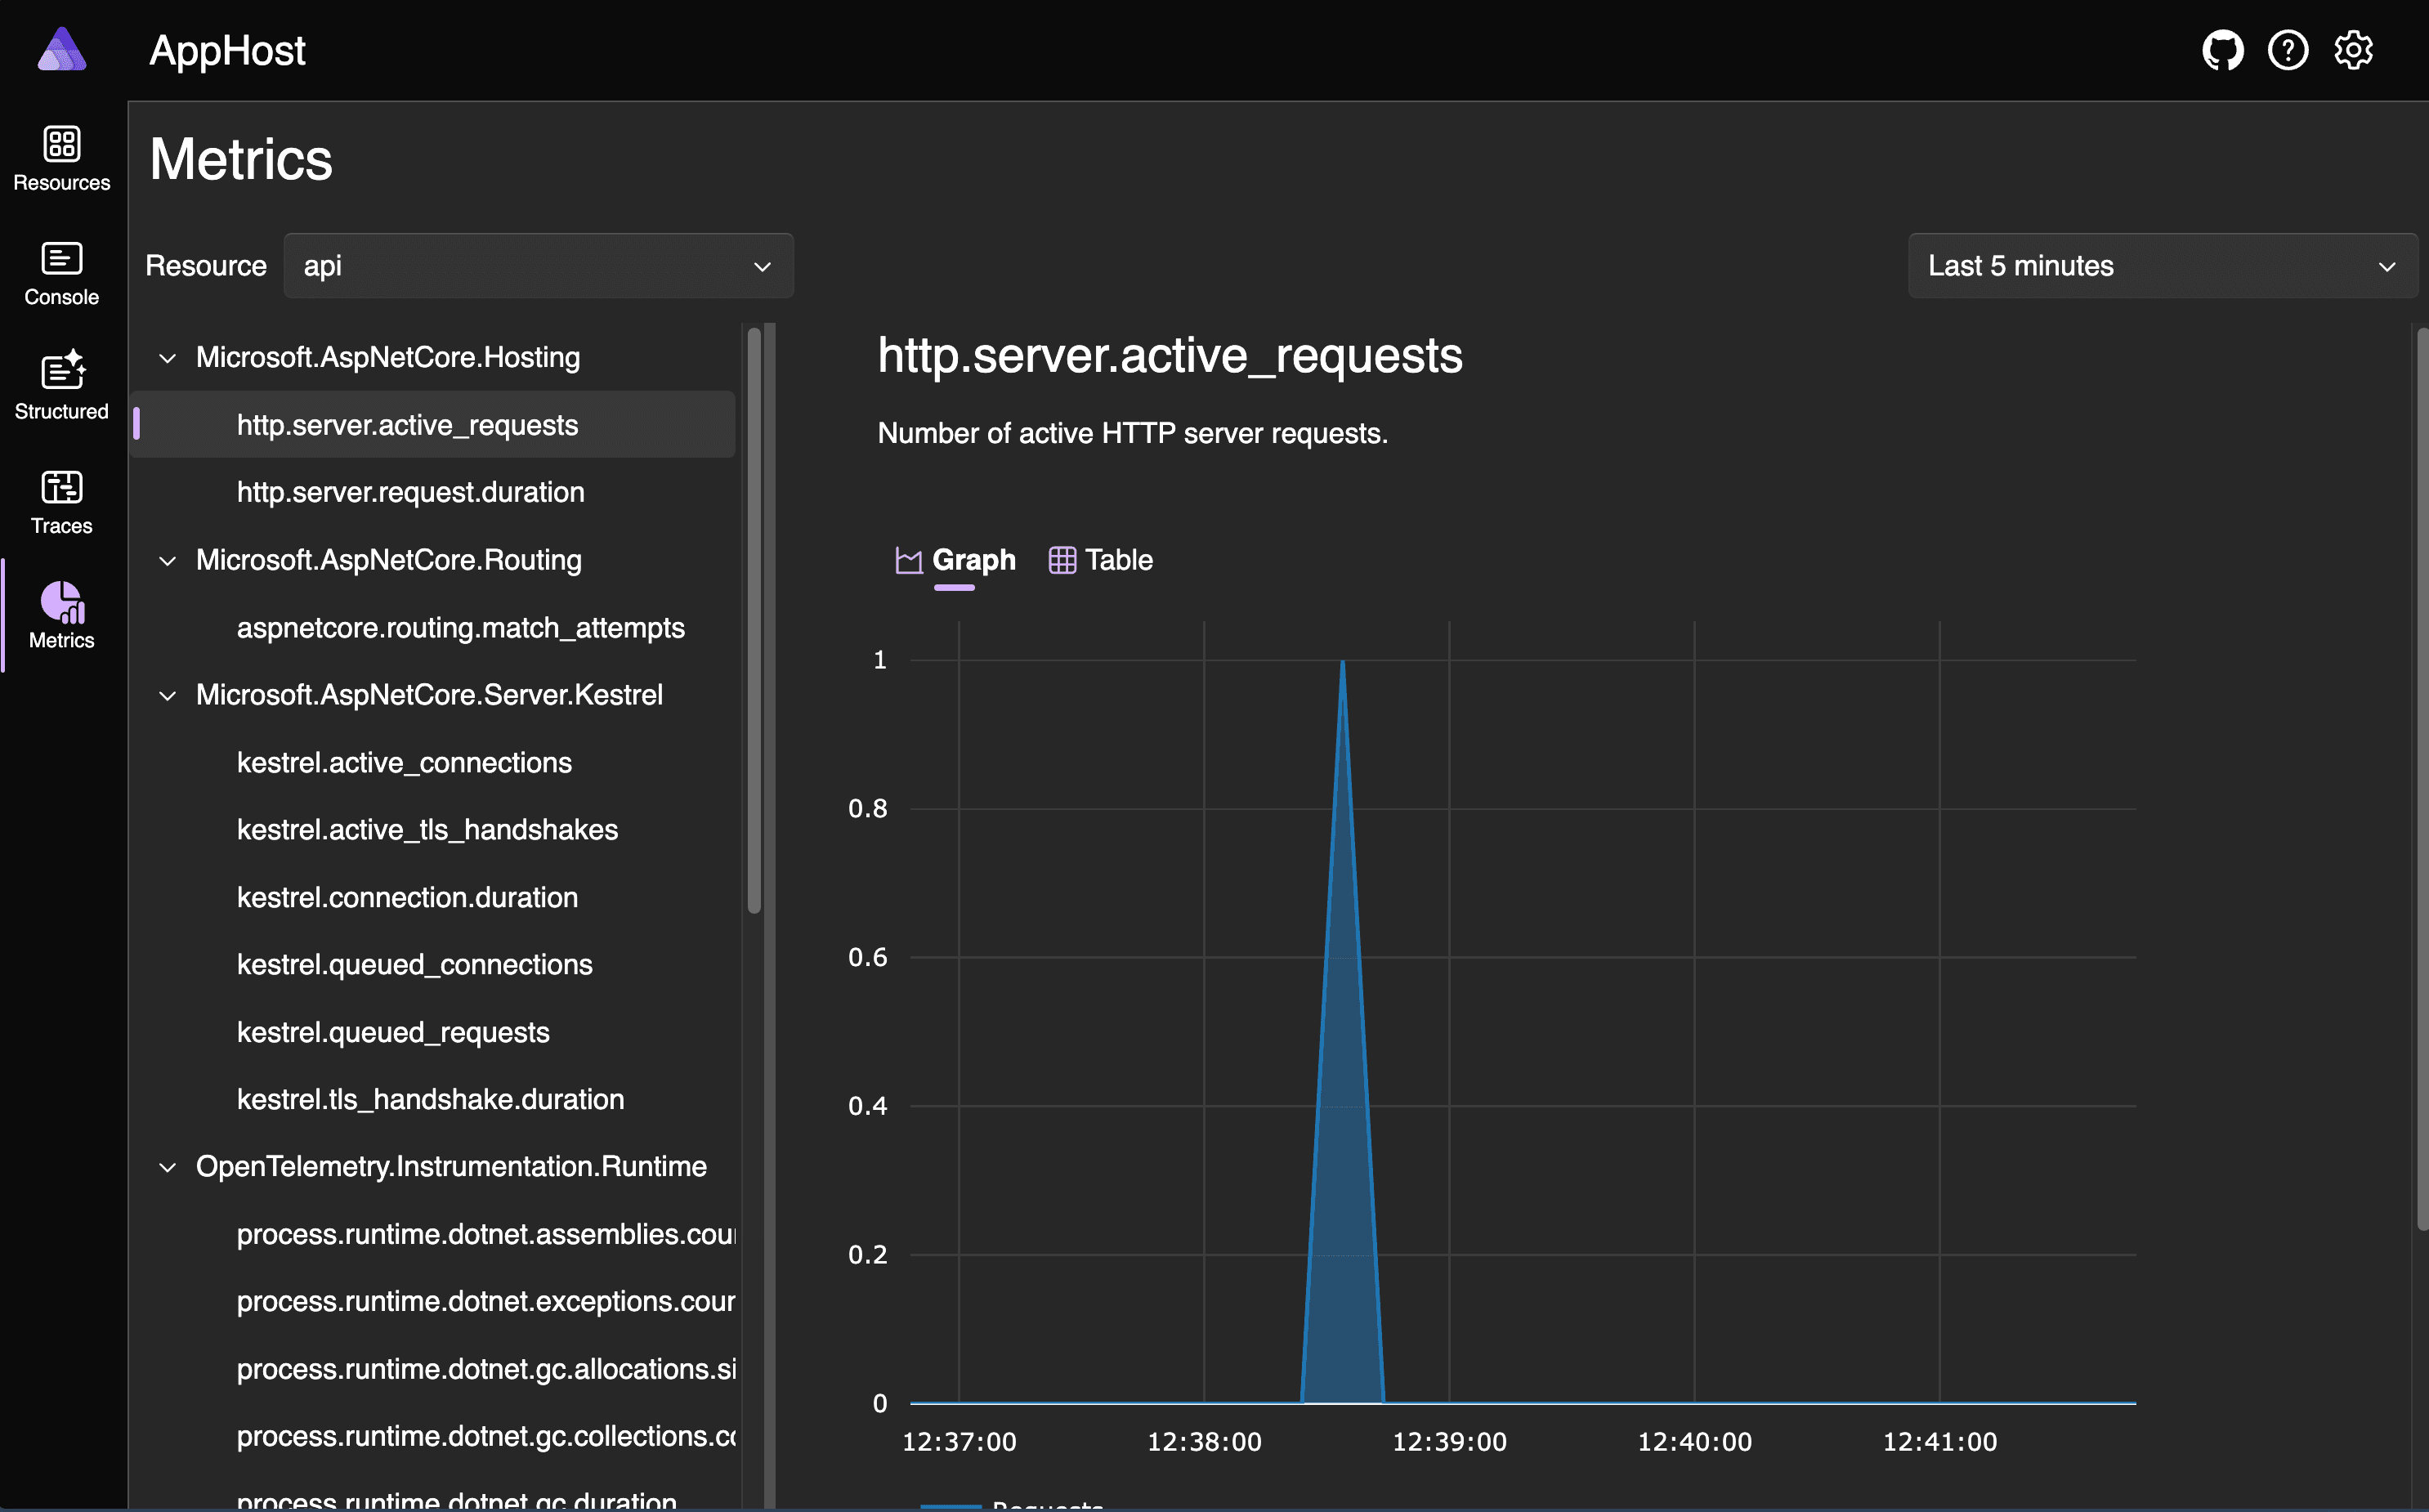
Lastly, we have metrics which allow us to see measurements of our application. This could be things like the number of requests per second, the average response time, or the number of errors.
All of the above is driven by Open Telemetry, which is a vendor-neutral standard for observability. This means that we can easily integrate with other observability tools, such as Prometheus, Grafana, or New Relic, or Application Insights.
This is wired up in our code via the ServiceDefaults. A typical ServiceDefaults file might look like this:
public static class Extensions
{
    public static TBuilder AddServiceDefaults<TBuilder>(this TBuilder builder) where TBuilder : IHostApplicationBuilder
    {
        builder.ConfigureOpenTelemetry();

        builder.AddDefaultHealthChecks();

        builder.Services.AddServiceDiscovery();

        builder.Services.ConfigureHttpClientDefaults(http =>
        {
            // Turn on resilience by default
            http.AddStandardResilienceHandler();

            // Turn on service discovery by default
            http.AddServiceDiscovery();
        });

        return builder;
    }

    public static TBuilder ConfigureOpenTelemetry<TBuilder>(this TBuilder builder) where TBuilder : IHostApplicationBuilder
    {
        builder.Logging.AddOpenTelemetry(logging =>
        {
            logging.IncludeFormattedMessage = true;
            logging.IncludeScopes = true;
        });

        builder.Services
            .AddOpenTelemetry()
            .WithMetrics(metrics =>
            {
                metrics
                    .AddAspNetCoreInstrumentation()
                    .AddHttpClientInstrumentation()
                    .AddRuntimeInstrumentation();
            })
            .WithTracing(tracing =>
            {
                tracing
                    .AddAspNetCoreInstrumentation()
                    .AddHttpClientInstrumentation();
            });

        builder.AddOpenTelemetryExporters();

        return builder;
    }

    private static TBuilder AddOpenTelemetryExporters<TBuilder>(this TBuilder builder) where TBuilder : IHostApplicationBuilder
    {
        var useOtlpExporter = !string.IsNullOrWhiteSpace(builder.Configuration["OTEL_EXPORTER_OTLP_ENDPOINT"]);

        if (useOtlpExporter)
        {
            builder.Services.AddOpenTelemetry().UseOtlpExporter();
        }

        return builder;
    }

    public static TBuilder AddDefaultHealthChecks<TBuilder>(this TBuilder builder) where TBuilder : IHostApplicationBuilder
    {
        builder.Services.AddHealthChecks()
            // Add a default liveness check to ensure app is responsive
            .AddCheck("self", () => HealthCheckResult.Healthy(), ["live"]);

        return builder;
    }

    public static WebApplication MapDefaultEndpoints(this WebApplication app)
    {
        // Adding health checks endpoints to applications in non-development environments has security implications.
        // See https://aka.ms/dotnet/aspire/healthchecks for details before enabling these endpoints in non-development environments.
        if (app.Environment.IsDevelopment())
        {
            // All health checks must pass for app to be considered ready to accept traffic after starting
            app.MapHealthChecks("/health");

            // Only health checks tagged with the "live" tag must pass for app to be considered alive
            app.MapHealthChecks("/alive", new HealthCheckOptions
            {
                Predicate = r => r.Tags.Contains("live")
            });
        }

        return app;
    }
}
The aim of ServiceDefaults is to provide sensible defaults for our application. The configuration is an opinionated view of what should be common to most applications. The config is just a starting point and can be customised to suit your needs.
At a high level, the ServiceDefaults configures:
- Open Telemetry for metrics, traces, and logs
- Health checks
- Service Service
- Resiliency for HTTP clients (e.g. retries to handle transient errors)
Integrations
Aspire integrations are pre-configured NuGet packages that provide observability, resiliency, and scalability. They often come in two flavours, hosting and client integrations.
- Hosting Integrations: These are used to configure the C# App Host to set up the resources needed for your application.
- Client Integrations: These are used to configure your applications to use the resources provided by the hosting integrations. This often sets up defaults for observability, resiliency, and scalability.
They are designed to be used with the C# App Host, and are configured via the ServiceDefaults.
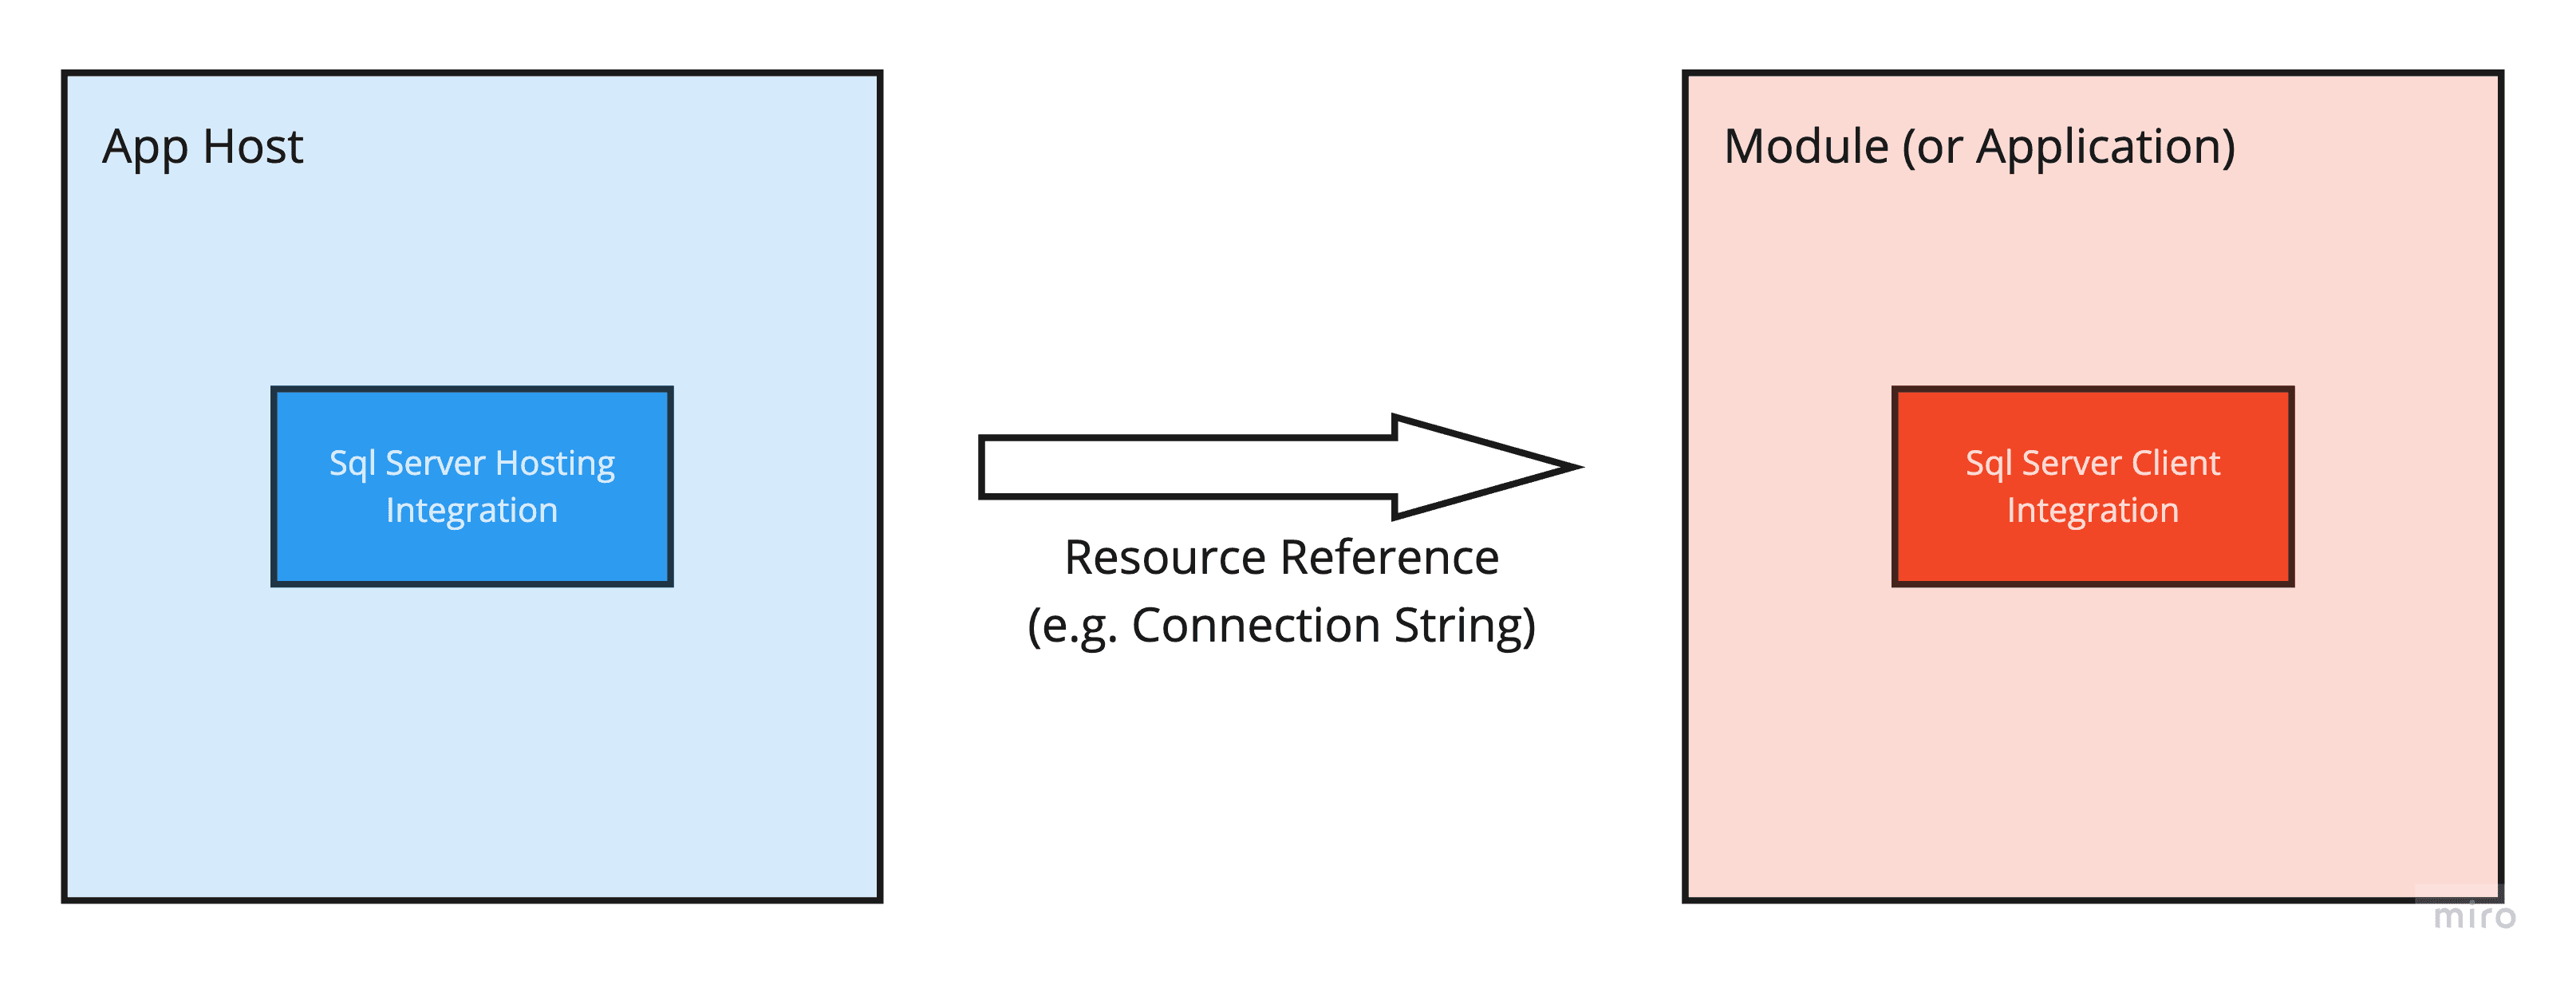
The SQL Server hosting integration is setup via:
var sqlServer = builder
    .AddSqlServer("sql")
    .WithLifetime(ContainerLifetime.Persistent);

var catalogDb = sqlServer.AddDatabase("catalog");
The SQL Server client integration is setup via:
internal static class DependencyInjection
{
    internal static void AddPersistence(this IHostApplicationBuilder builder)
    {
        builder.AddSqlServerDbContext<CatalogDbContext>("catalog",);
    }
}
This code comes from the Aspire.Microsoft.EntityFrameworkCore.SqlServer package and configures the following in the CatalogDbContext:
- Connection pooling
- Retries
- Health checks
- Logging
- Telemetry
Again, all of these configurations are just a starting point and can be customised to suit your needs.
You might also noticed that the same string catalog is used in both the hosting and client integrations. This is not a coincidence. The hosting integration creates a resource with the name "catalog", and the client integration uses this name to find the resource. This is how the client integration knows how to connect to the database.
Deployment
Deployment is the final piece of the puzzle. Aspire provides a way to easily provision cloud resources and deploy your application via the Azure Developer Cli (azd).
Once you have the Azure Developer Cli installed, you need to first initialize your application via azd init. This will inspect your Aspire App Host and create several files needed for deployment.
The second command to run is azd up which deploy your Modular Monolith to Azure Container Apps. This works as follows:
- Confirm Azure region and subscription
- Create all infrastructure needed
- Resource group
- Managed identities
- Azure SQL server & DB
- Container app environment
- Container apps (one for each deployable)
- Container registry
- Log analytics workspace
- Create docker images for each application and push them to the container registry
WOW, that's a lot of heavy lifting! 😮
This approach can be great as a starting point or to push prototypes to Azure, but you may also want to generate your bicep files manually to have more control over how your Azure resources are provisioned.
What's new in Aspire for .NET 9?
Amongst other things, some of the most helpful new features in Aspire include:
- Ability to start and stop resources from the dashboard
- Persistence container lifetimes
- Ability to wait for a resource to be ready (
WaitFor()) to to have finished running (WaitForCompletion()) - Ability to run a command on a resource (e.g. re-creating a database, or clearing a cache)
- Control over how a resource gets deployed (e.g. a database could be deployed to an Azure SQL DB, or an Azure Container App)
Conclusion
IMHO .NET Aspire is a no brainer for any .NET application that has more than one moving 'piece'. If you're currently using docker compose, or something similar, I'd recommend giving Aspire a try.
The tooling significantly simplifies the inner development loop by providing a unified dashboard, streamlined configuration, and powerful orchestration capabilities. With features like service discovery, health monitoring, and seamless cloud deployments, .NET Aspire removes much of the complexity traditionally associated with Modular Monolith development.
What's particularly exciting is how .NET Aspire continues to evolve with .NET 9, introducing features that make local development even more productive. Whether you're building a new Modular Monolith or modernizing an existing application, Aspire provides a solid foundation that scales from development through to production.
Let me know how you find the combination of Modular Monoliths and .NET Aspire.