- Published on
Bit Bucket Pipelines - Part 3: Deploying a React app to Azure Blob Storage
3 min read- Authors

- Name
- Daniel Mackay
- @daniel_mackay
Series
- Part 1: Building and Testing ASP.NET Core
- Part 2: Deploying ASP.NET Core to Azure Web App
- Part 3: Deploying a React App to Azure Blob Storage
- Part 4: Deploying a Function App to Azure with Bicep
Intro
In Part 1 of this series, we walked through the basics of Bit Bucket Pipelines and how to build and test a .NET Core app.
In Part 2 of this series we walked through how to publish the .NET Core application and deploy it to a Web App in Azure.
In Part 3 of this series we will see how to build and publish a react application to Azure Blob storage.
Creating our React App
First, we need to create a frontend application. We could use any frontend framework such as Angular, Vue, or even plain HTML. My personal preference is React.
Let's use create react app to scaffold out a typescript based application.
NOTE: I'm doing this via WSL 2 (Ubuntu) on Windows.
npx create-react-app react-pipelines --template typescript
Navigate to our new application:
cd react-pipelines
And after a small tweak to App.tsx we run:
yarn start
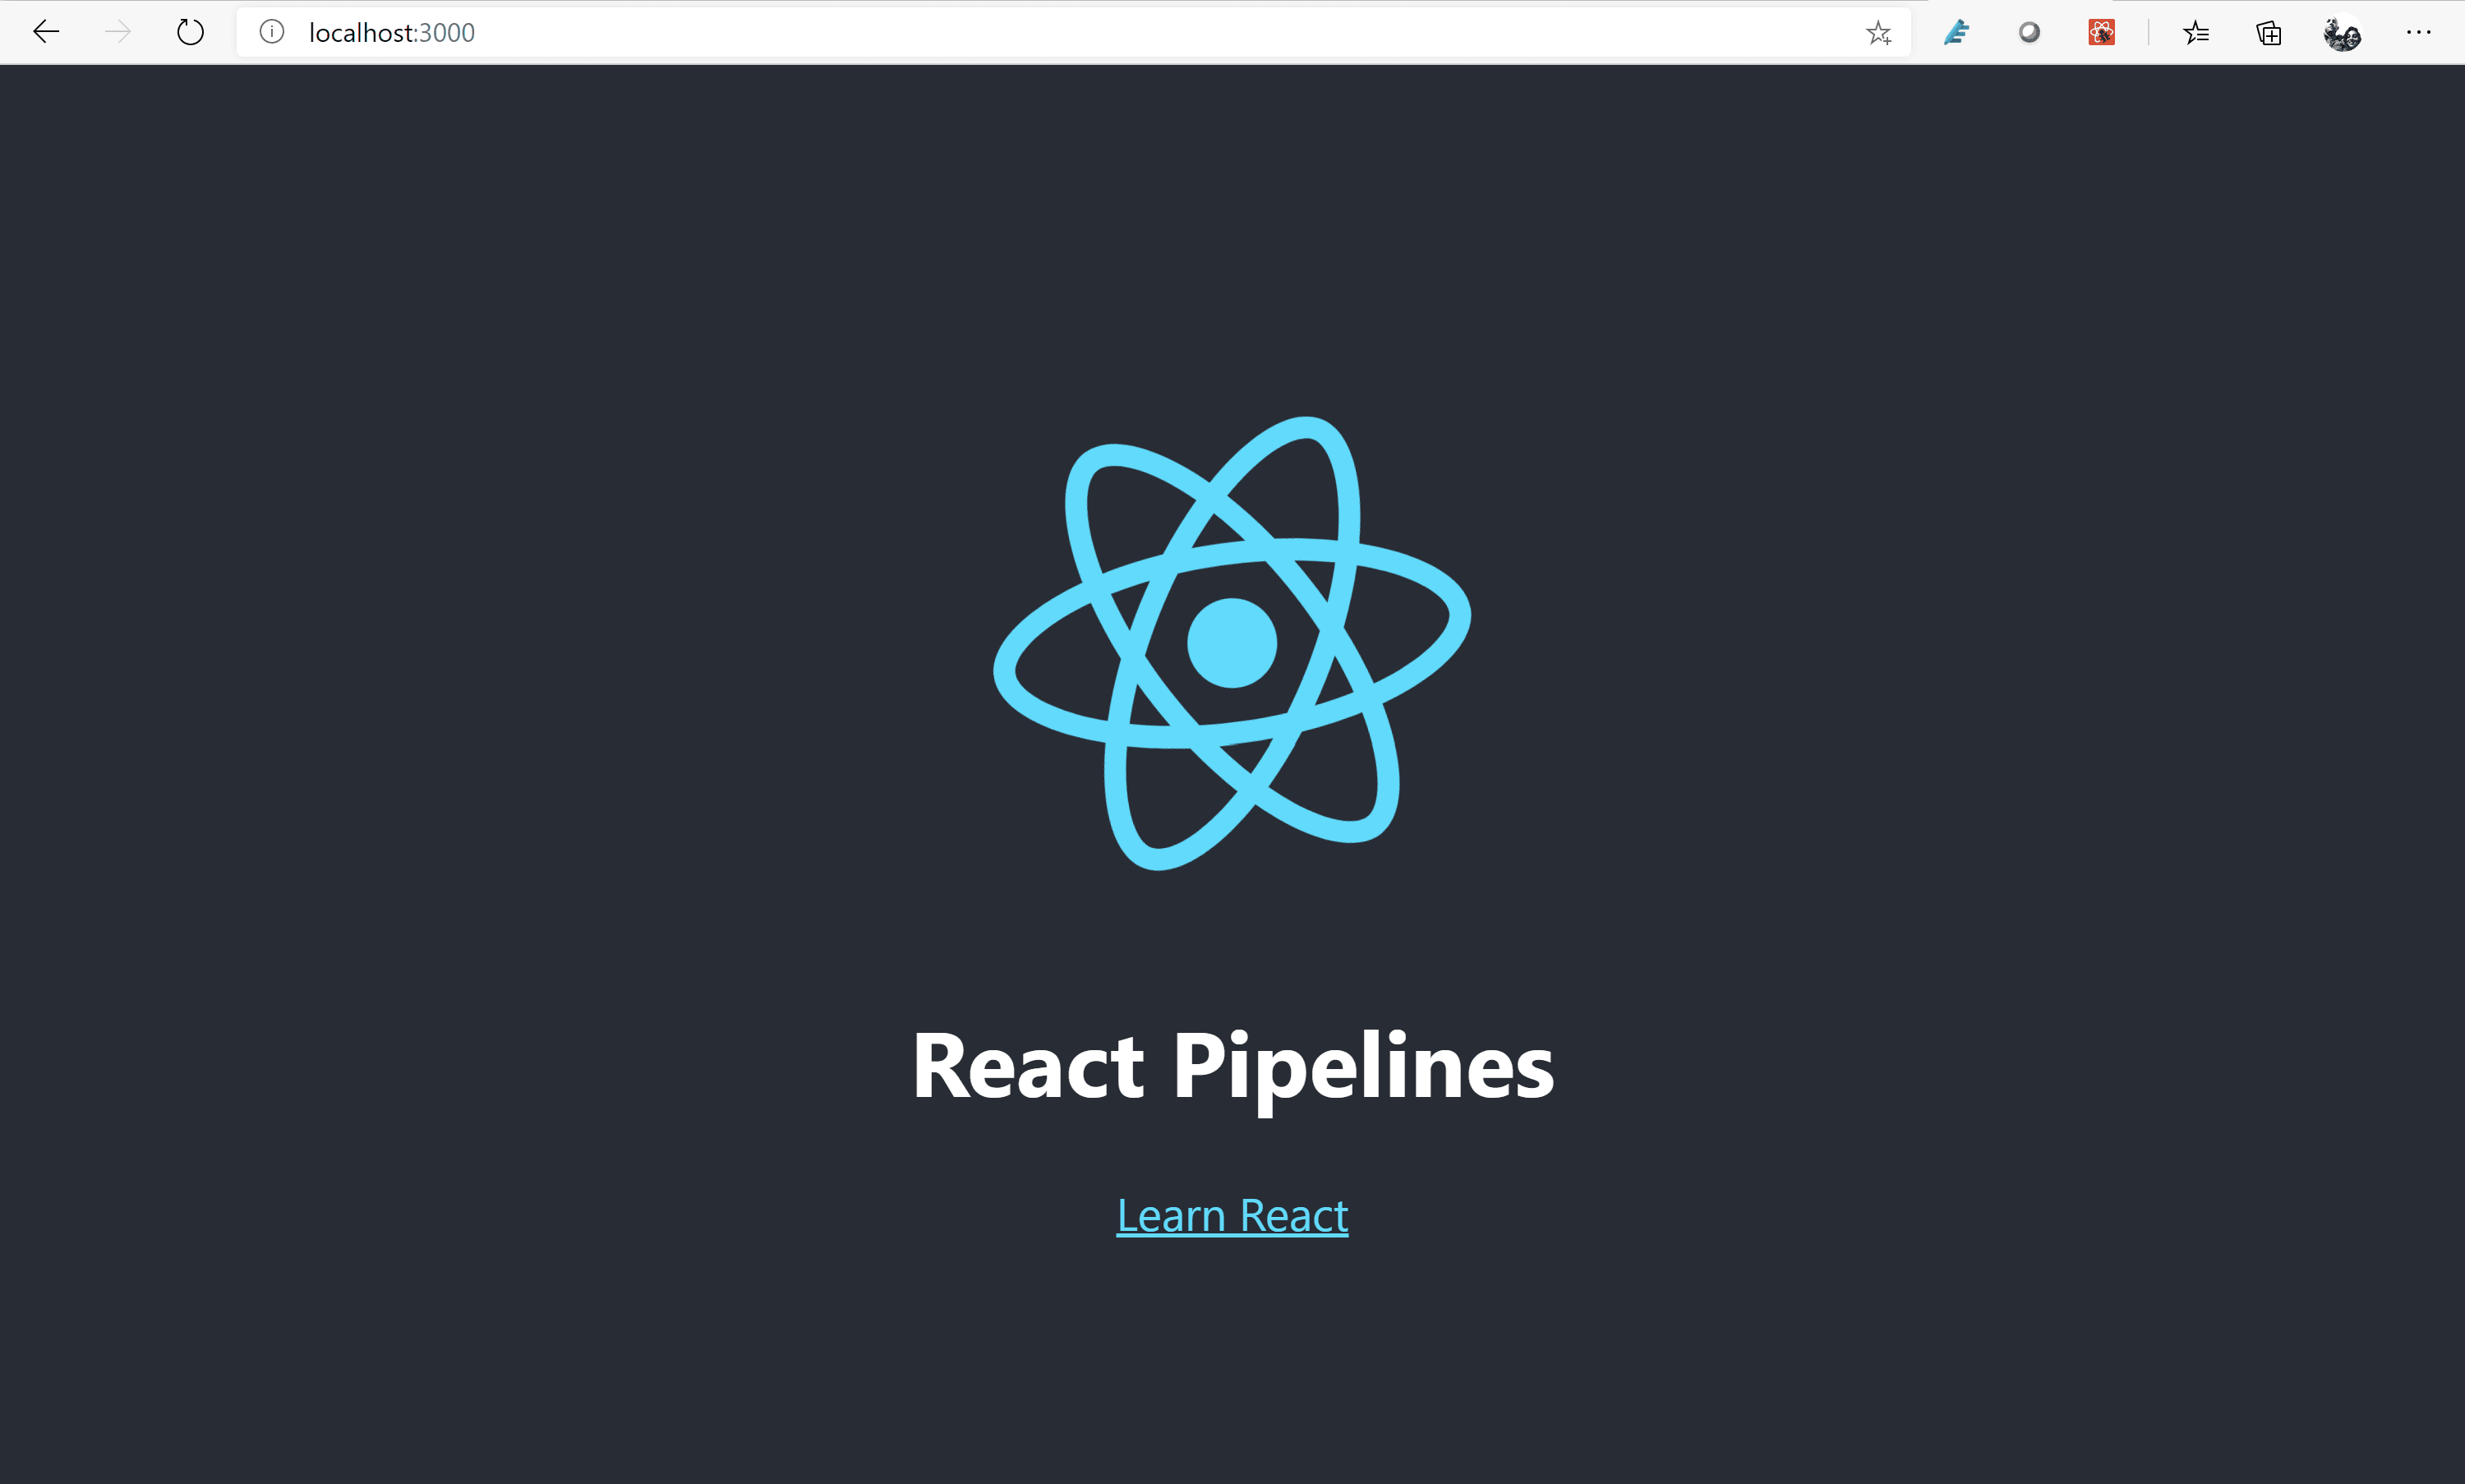
And voila:
Building
We can easily build, test, and package our react app with the following pipeline:
image: node:10.15.3

pipelines:
  default:
    - step:
        caches:
          - node
        script:
          - yarn install
          - yarn test --all --forceExit
          - yarn build
        artifacts:
          - build/**
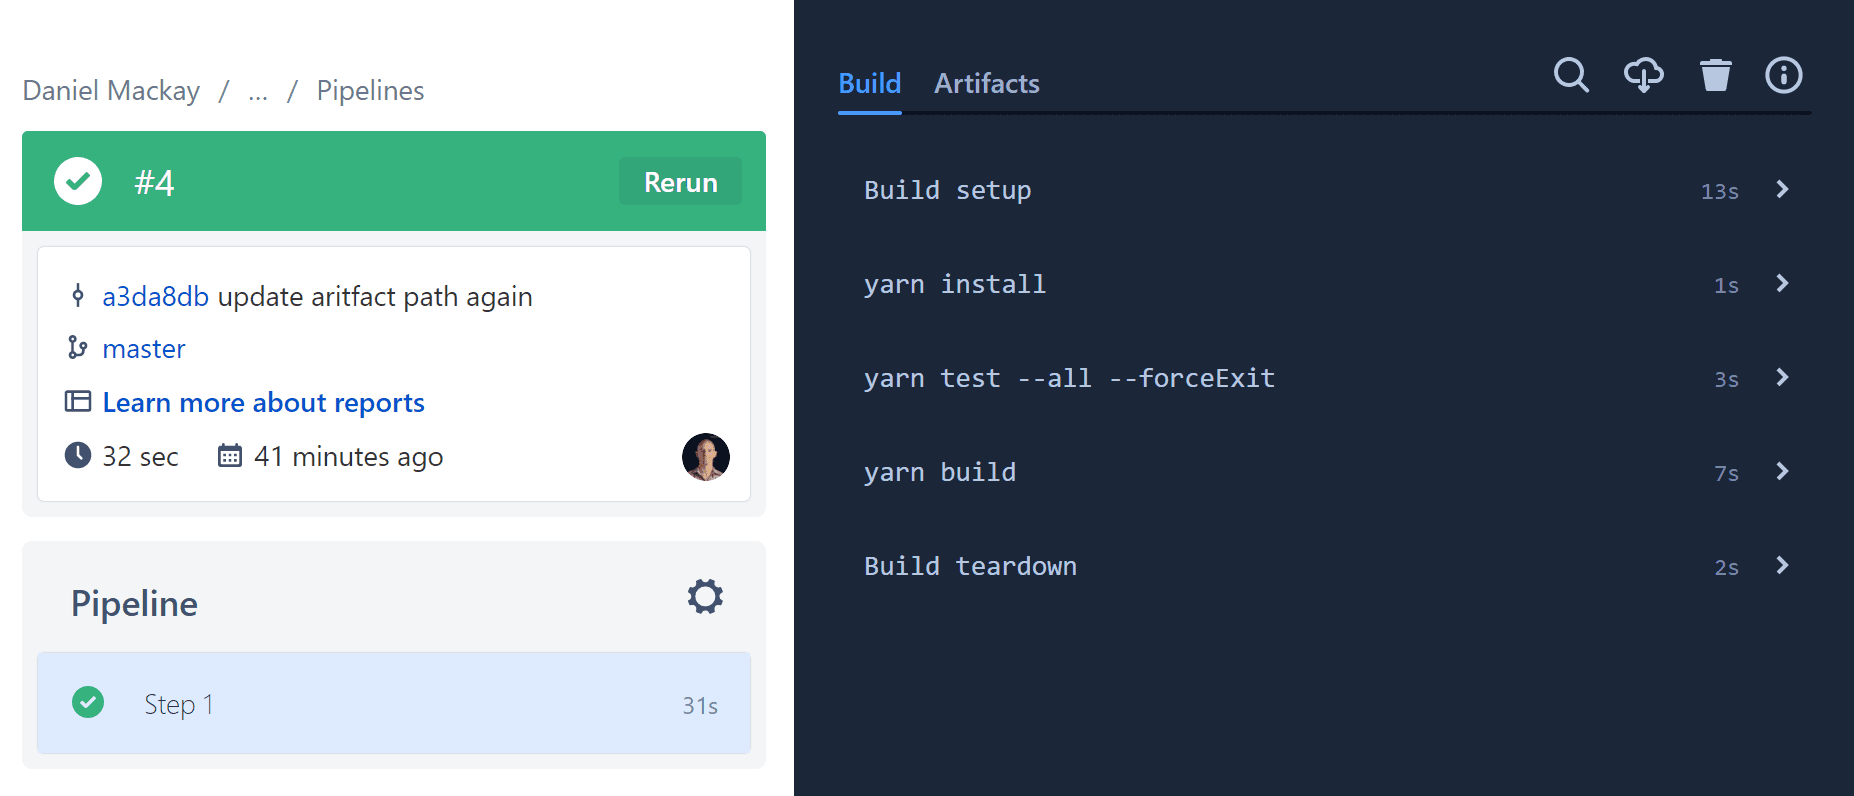
If all has gone well we will see our successful build:
Deployment
Azure Storage
Before we can deploy, we need somewhere to. For the brevity of this blog post, I'll assume you already have an Azure Subscription and know how to create a Storage Account.
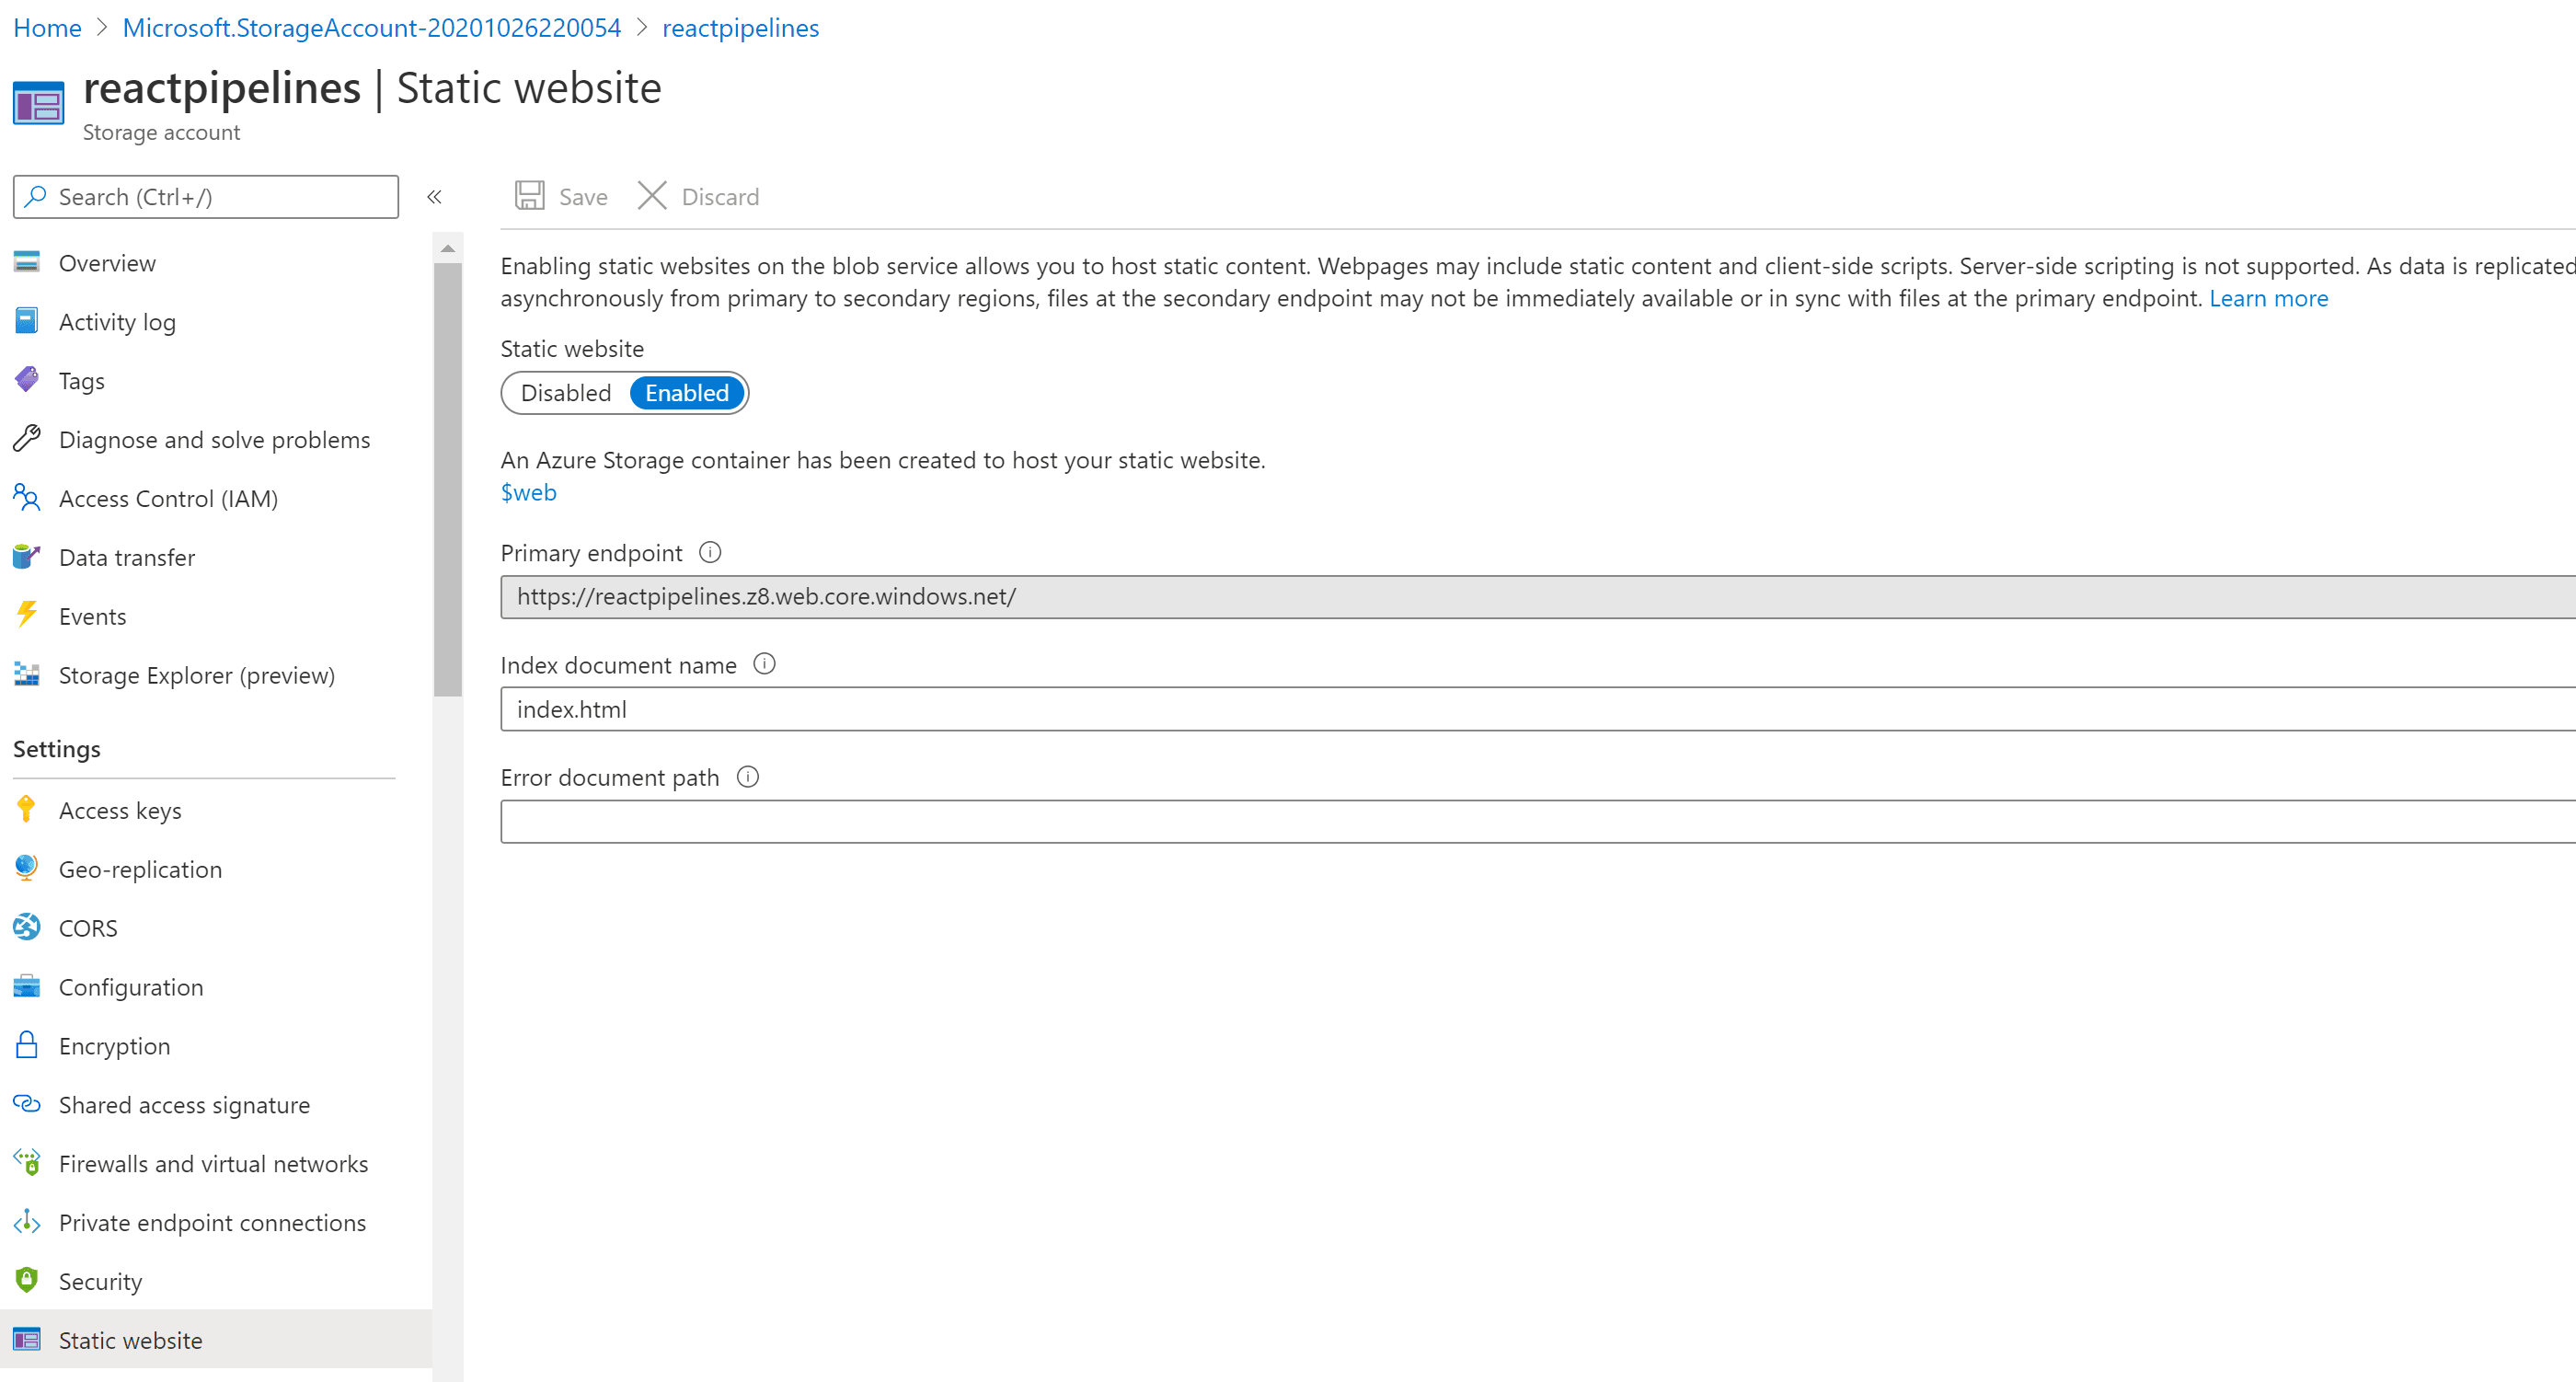
Once we have our storage account we need to configure it as a static site like so:
We will also need to generate a Shared Access Secret which will be used to allow our pipeline to publish to our blob storage account. This can be done as follows:
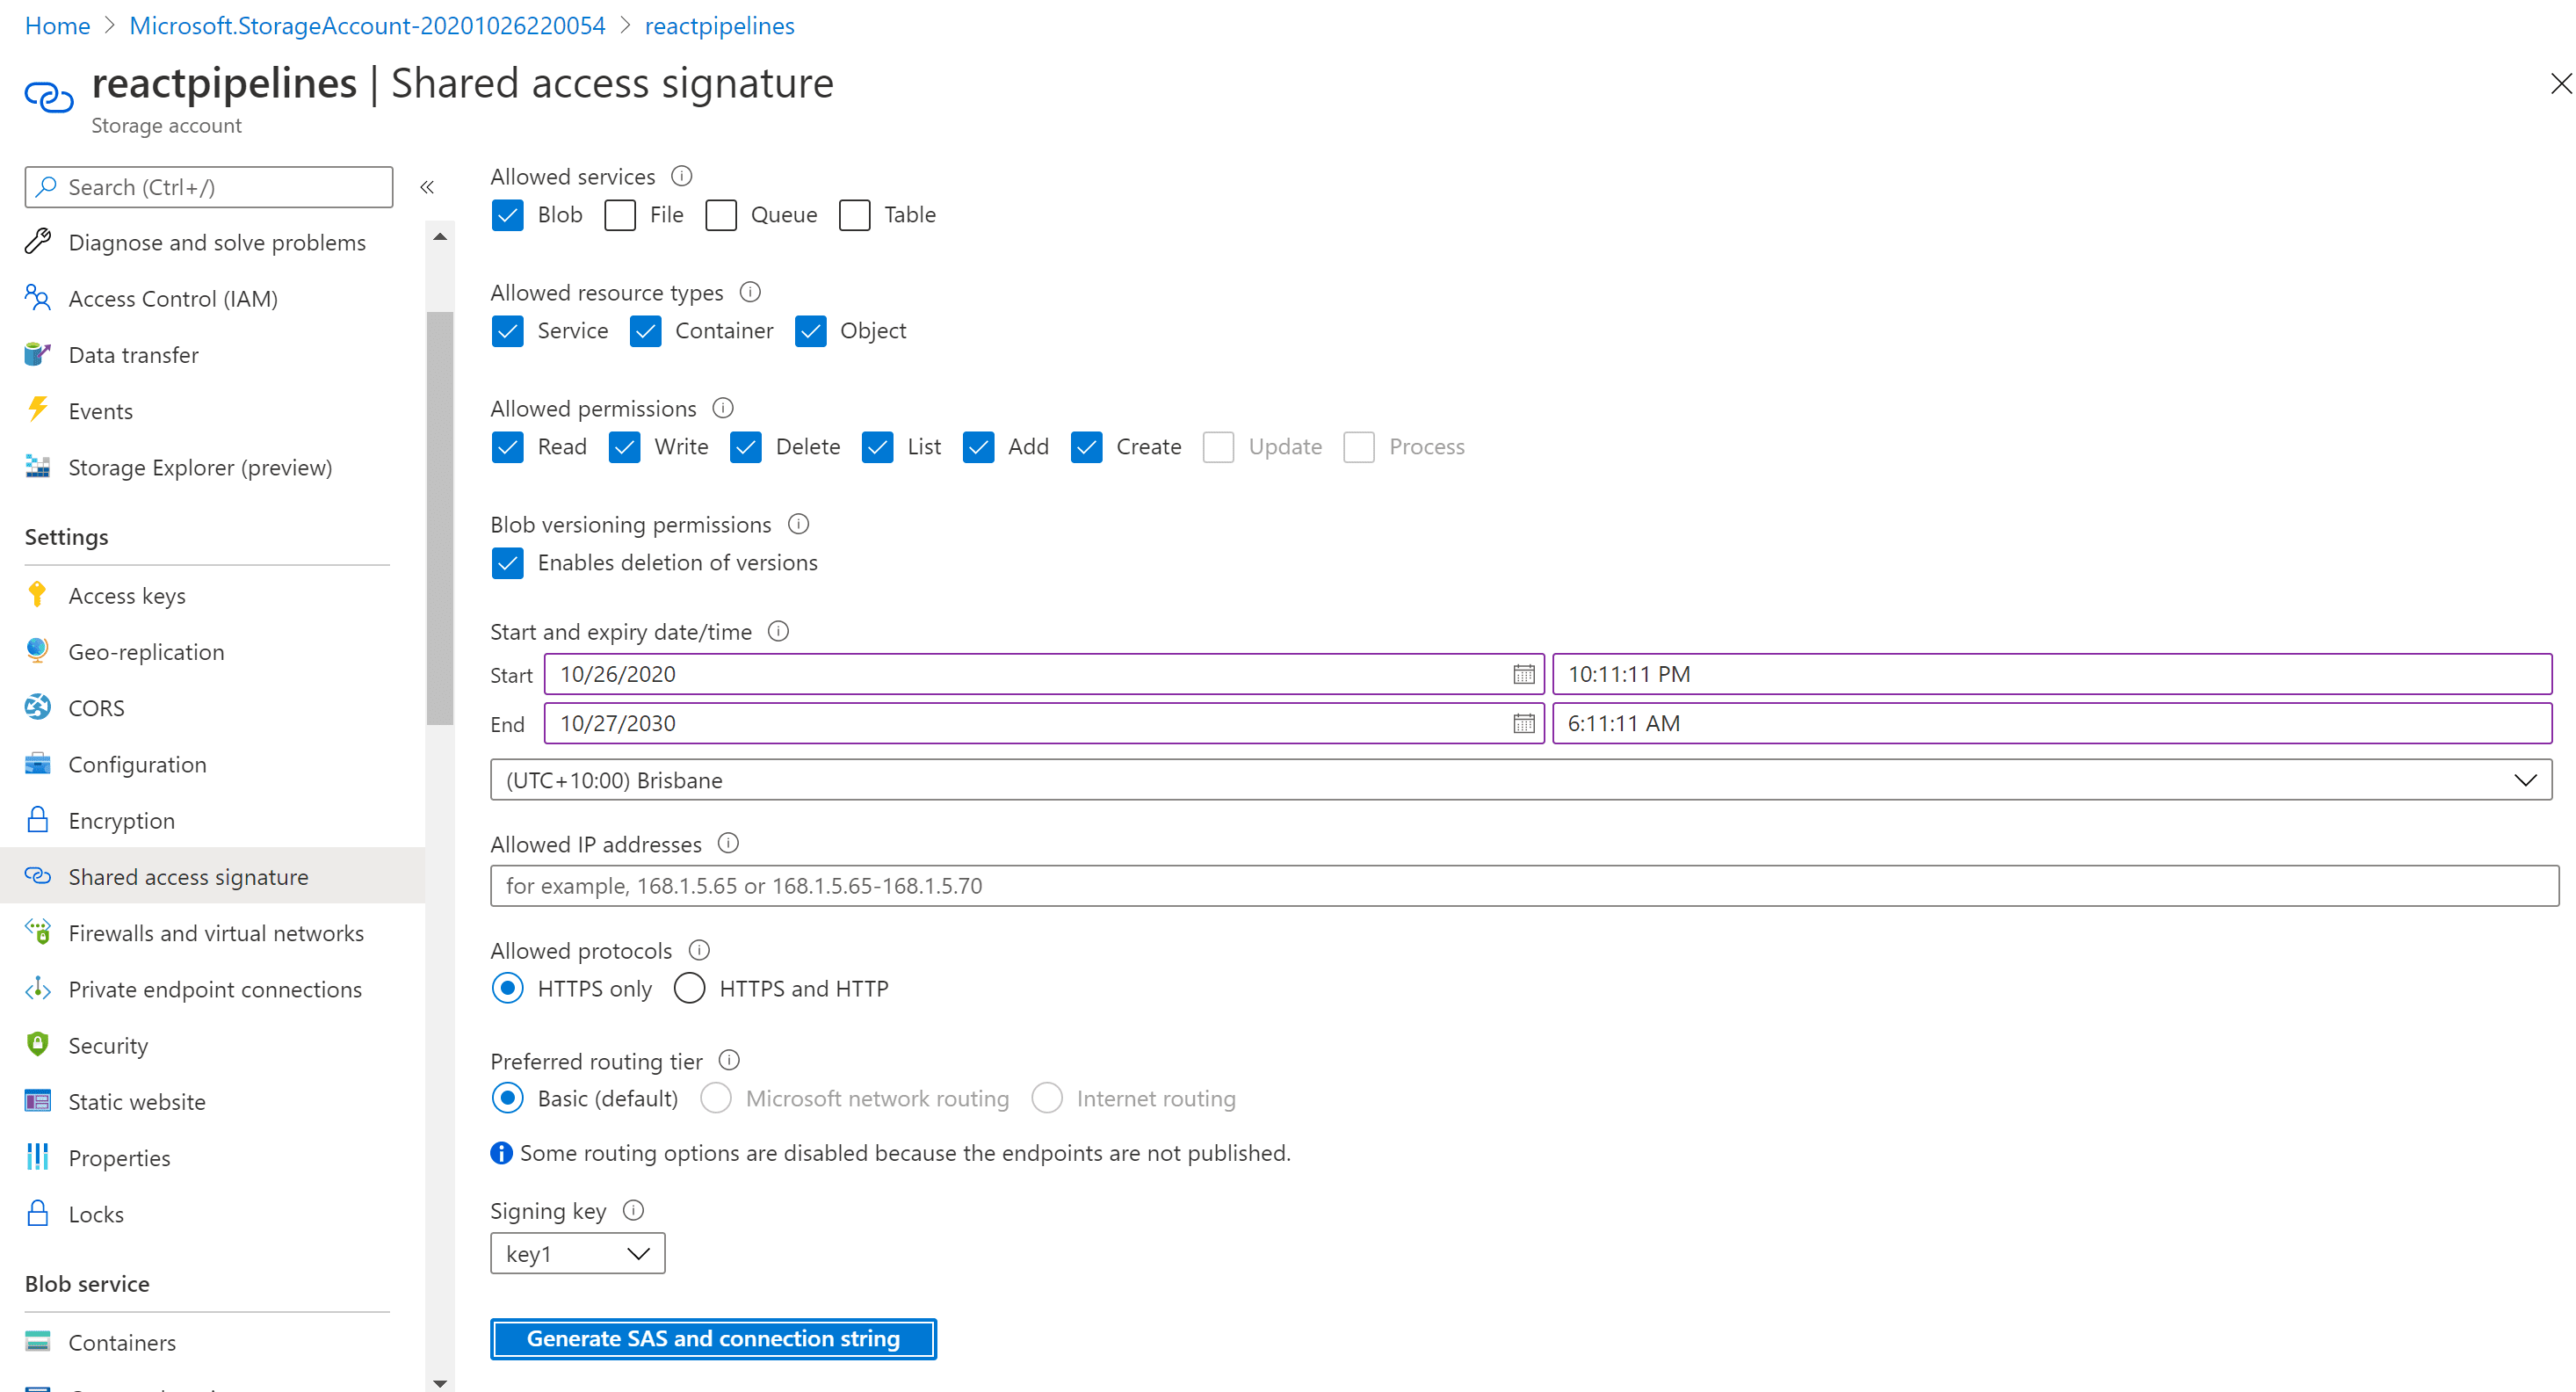
Copy the SAS Token generated from the screen as we will use that in our pipeline configuration.
Pipeline Configuration
To deploy our static site we will need to setup a deployment as follows:
- step:
    name: Deploy to test
    deployment: test
    trigger: manual
    script:
    - pipe: microsoft/azure-storage-deploy:2.0.1
        variables:
        SOURCE: 'build/**'
        DESTINATION: 'https://reactpipelines.blob.core.windows.net/%24web/'
        DESTINATION_SAS_TOKEN: $SAS_TOKEN
        EXTRA_ARGS: '--from-to localBlob --recursive'
The SOURCE variable needs to match our artifact from the previous step. The DESTINATION variable is set to the URL of our blob account. Note, that this is NOT the same as the public URL for your static website. We need to URL encode the $web directory which gives us the %24web portion of the URL. The EXTRA_ARGS tell the pipe that we are copying from the local machine (i.e. the docker image) to blob storage.
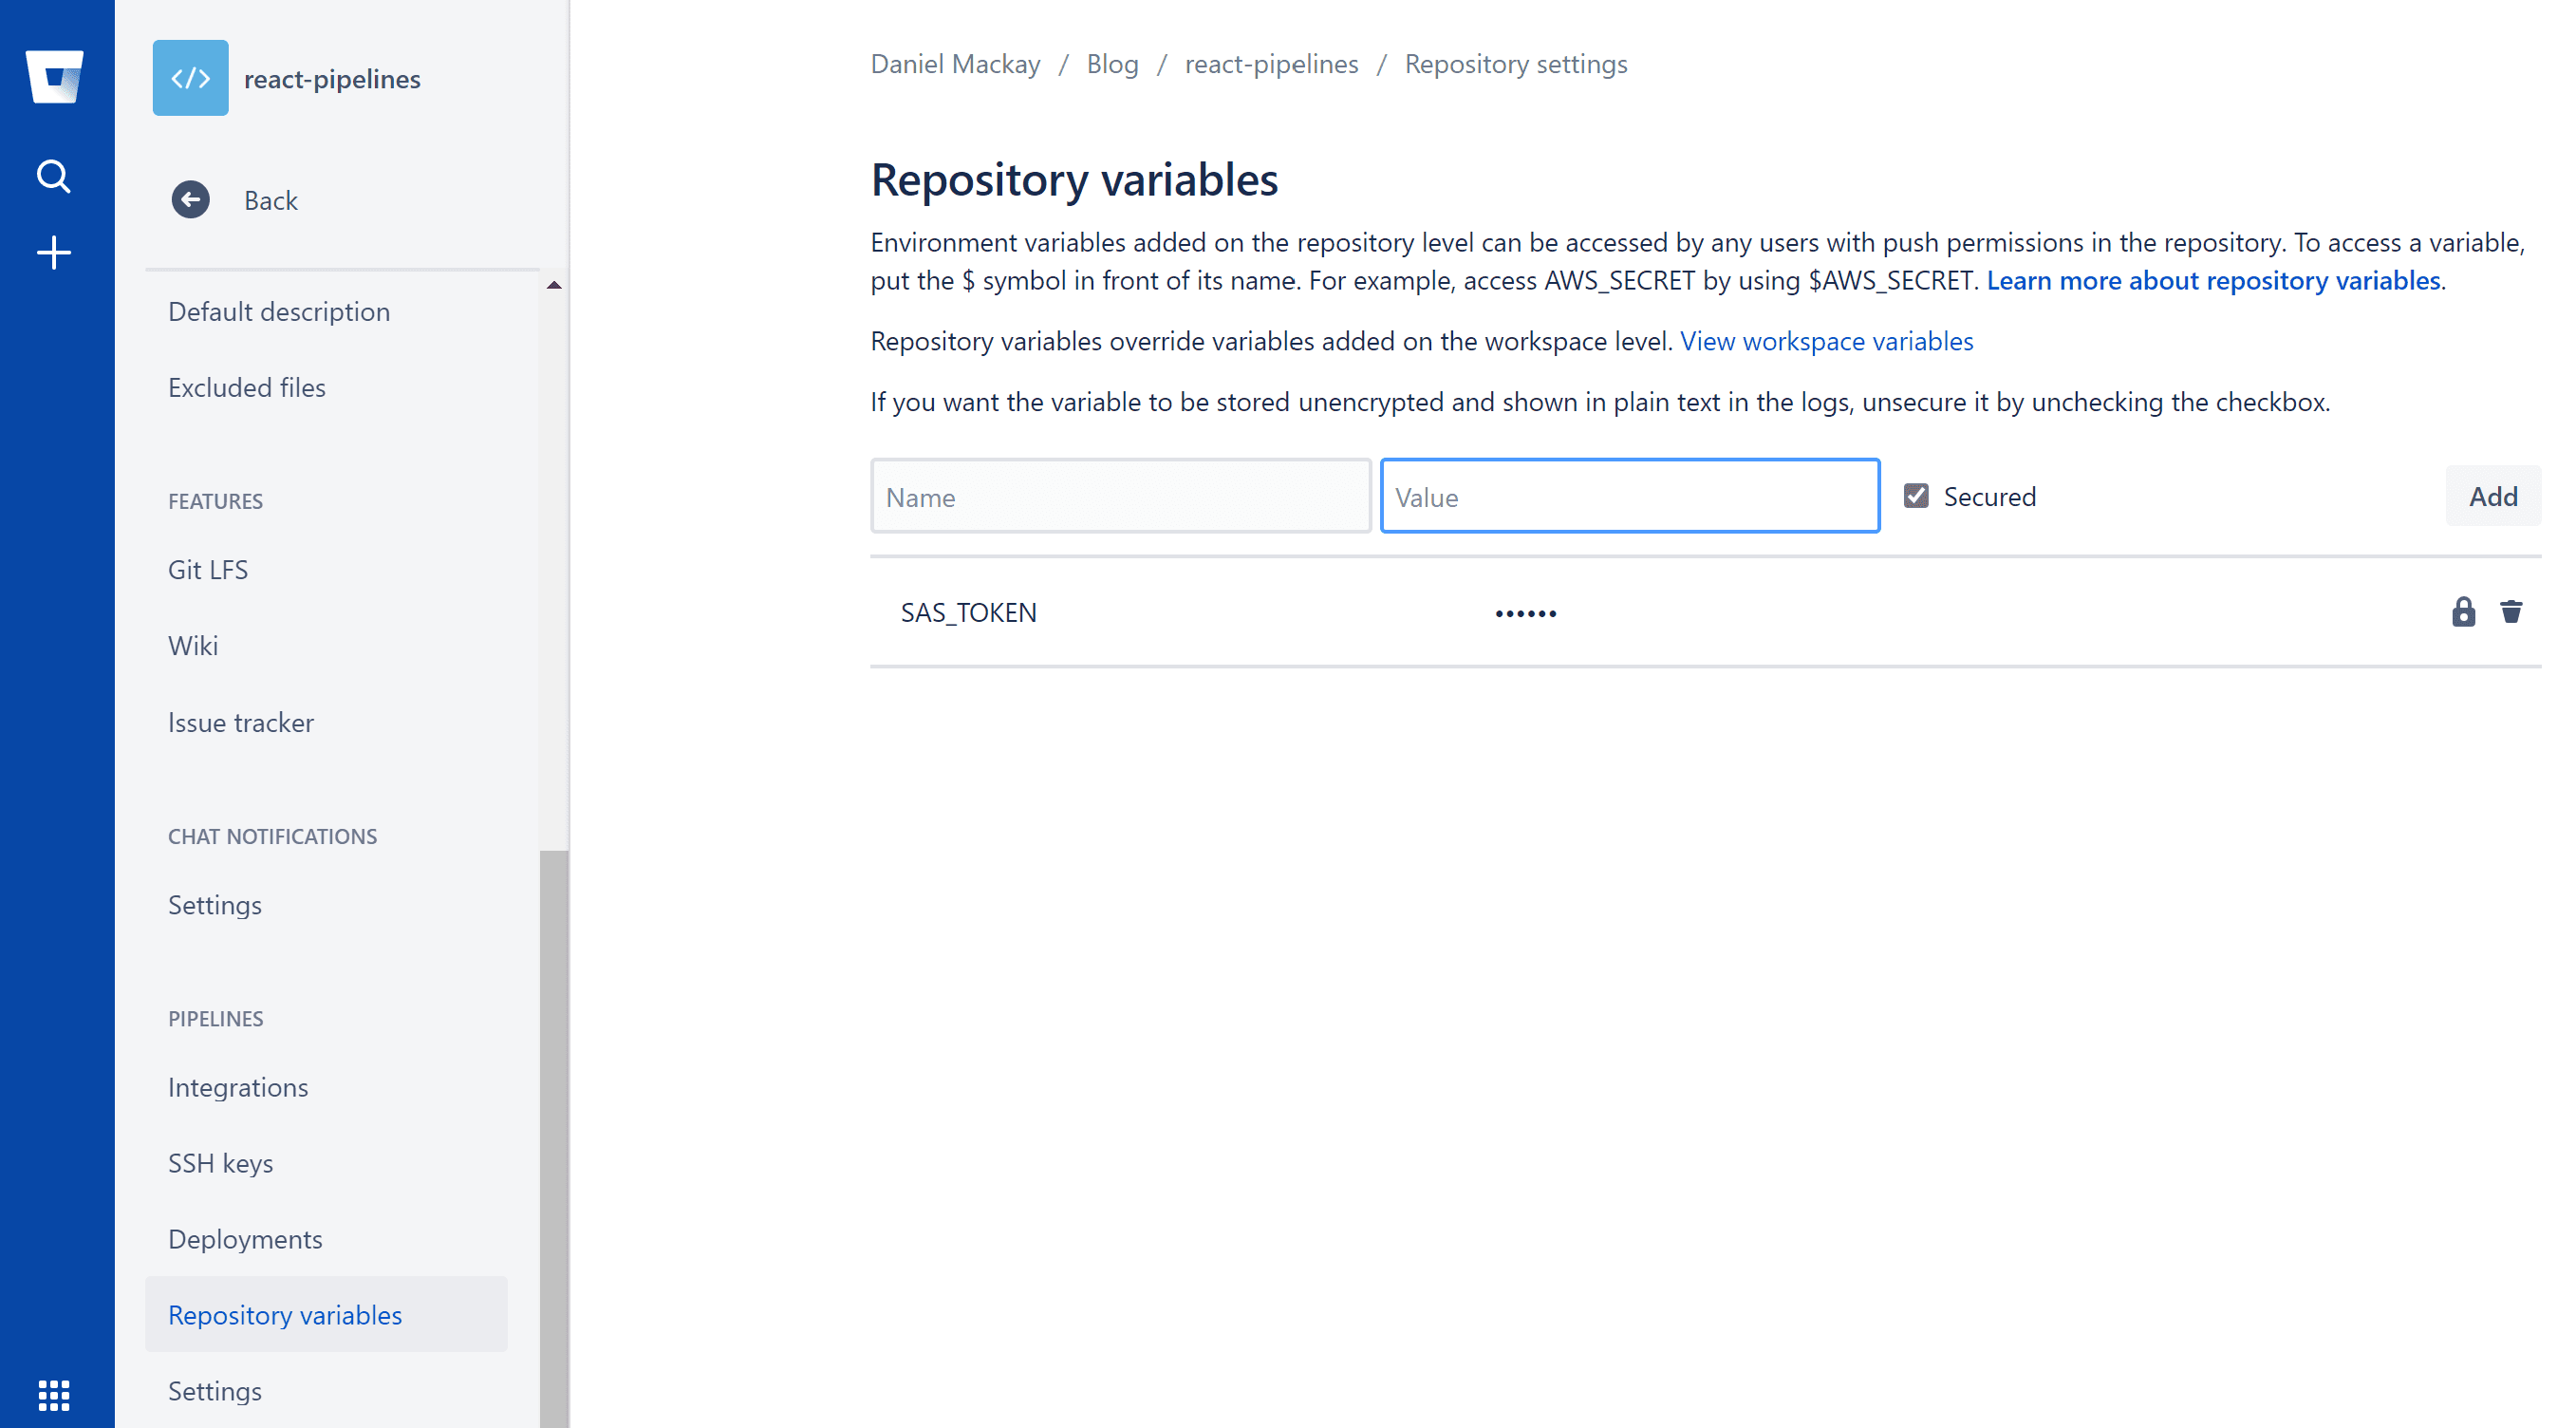
The $SAS_TOKEN we will securely store as a repository variable as follows:
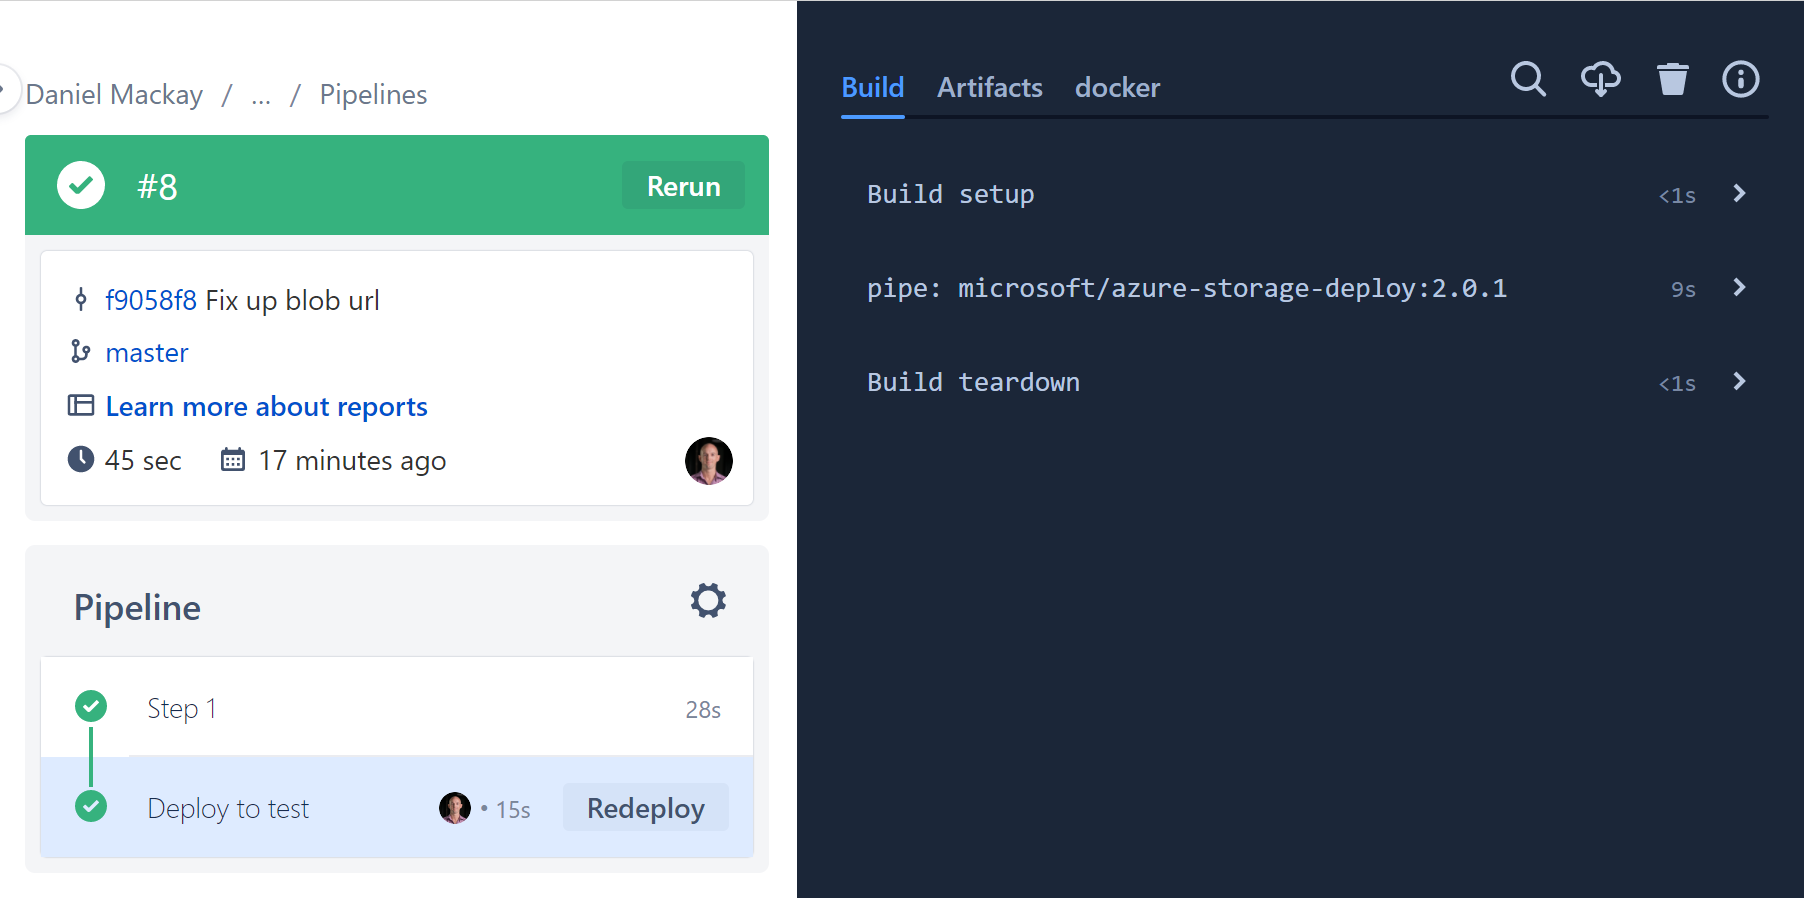
A few fixed builds later, if all has gone well we will get a successful build and deployment:
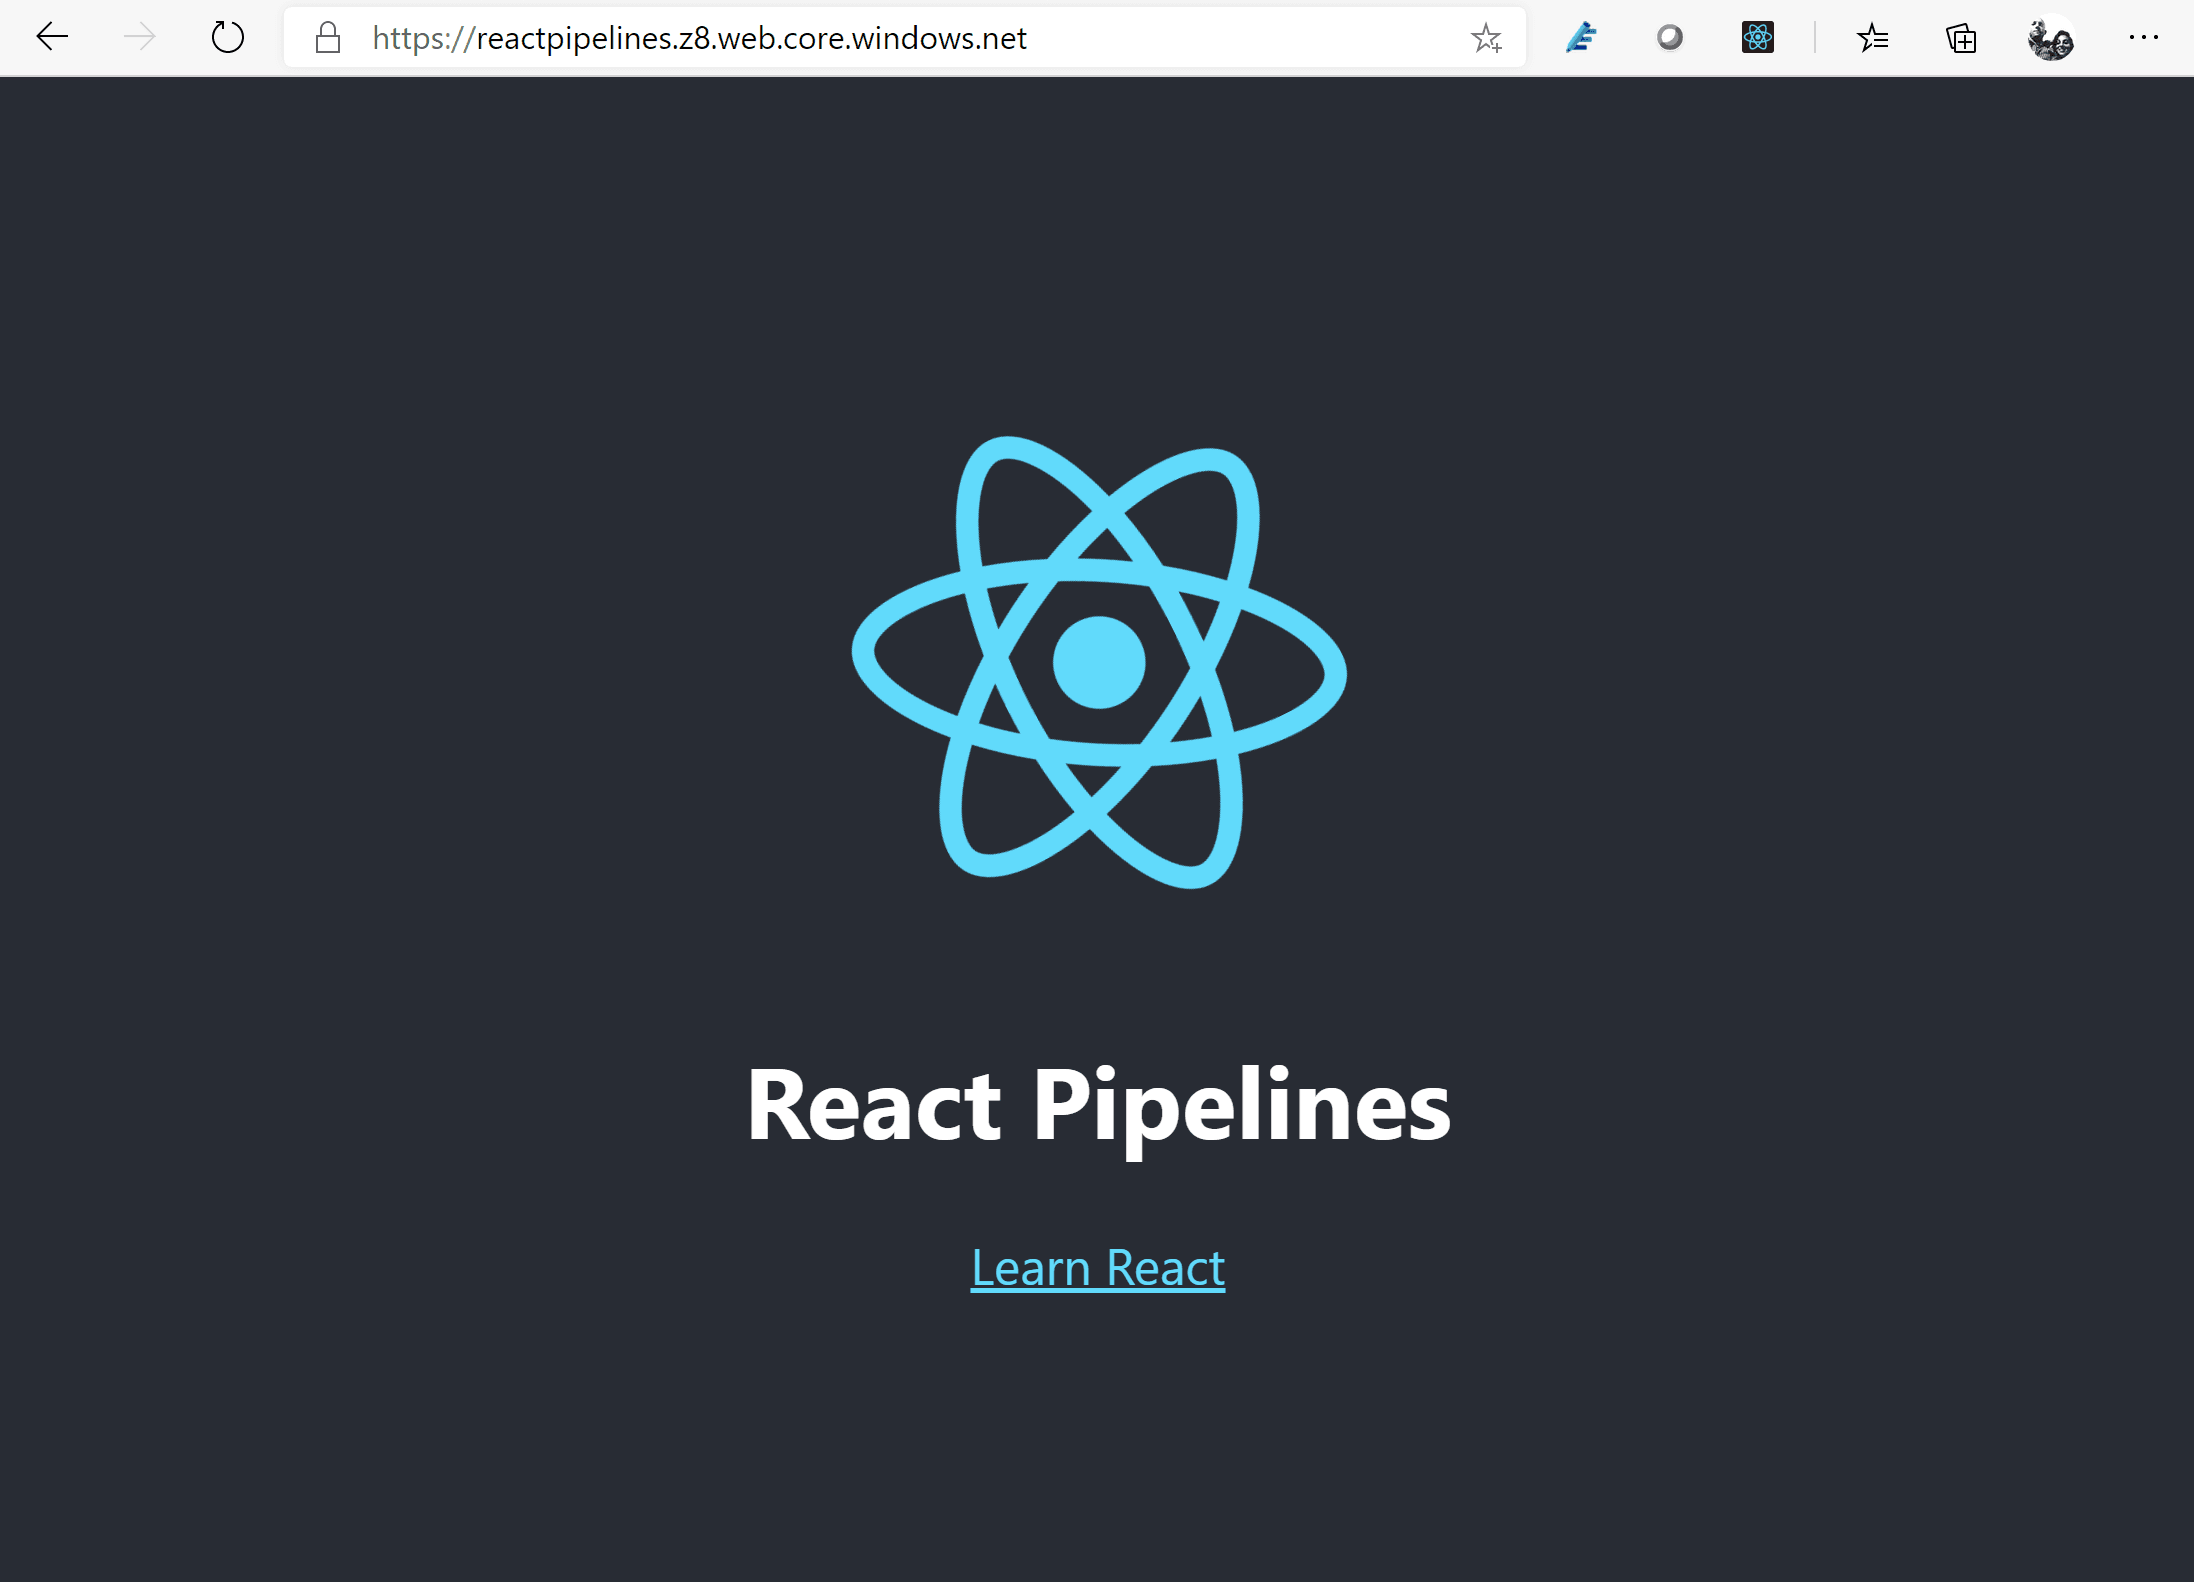
And our react site will be live!
Summary
In this article we've seen how easy it is to create a react application via create-react-app, create a pipeline to build and test our app. Additionally, we've seen how to configure Azure storage to host a static website, and how to deploy our react app to that site.
This concludes the end of our 3 part series on Bit Bucket Pipelines. I hope that I've helped you to see how easy some of these tasks are to setup in pipelines (especially when you have a working example to copy from 😉).
Happy pipelines!