- Published on
Bicep - Part 1: Introduction to Automating Azure Resource Creation
6 min read- Authors

- Name
- Daniel Mackay
- @daniel_mackay

Series
Overview
Hello friends! I keep a long list of topics that I would like to blog about that I am continually adding to. However, recently I've found out about a new(ish) technology called 'Bicep' and I feel obliged to spread the word and let this topic skip the queue!
What is Bicep? 💪
Bicep is a DSL (Domain Specific Language) designed specifically for describing Azure resources and is supported by Microsof. Once you have a Bicep template it can be used in combination with Azure CLI to automate provisioning of resources in Azure.
Under the hood, Bicep templates compile to ARM (Azure Resource Manager) templates, so anything you can do with ARM you can do with Bicep.
Why should I use Bicep?
The simplest way to create a resource in Azure is via the Portal. For a one-off deployment, this is fine. However, for any serious or commercial project you will often have to deploy the same infrastructure to multiple environments. Doing this manually via the Portal is not only time consuming, but error prone. Subsequent updates after the initial deployment, can also be error prone as you may test a change in your QA environment, but forget to make it in your UAT or PROD environment.
The previous solution for Azure Resource Automation, was to use ARM templates. These tended to be very verbose, repetitive, difficult to understand, and easy to get wrong. Bicep templates are far more expressive than ARM templates, and let you achieve much more with much less though use of variables, conditional logic, and loops.
Using Bicep templates may require a bit more upfront effort compared to using the Portal, but will ensure consistency across your environments, both during initial creation and subsequent updates. Once you have a suite of tried and tested templates, you can then use these on future projects, saving even more time.
Setup
To create resources with Bicep you will need 3 things:
- Azure CLI is installed (required)
- Bicep is installed (required)
- VS Code Extension (recommended)
Azure CLI
First up you need Azure CLI. You don't technically need this to work on Bicep templates. But you will need it if you want to deploy them.
Setup instructions can be found here.
Bicep
Assuming you've got the Azure CLI, this part is easy. Bicep can be installed by running:
az bicep install
If you need to upgrade this later, it can be done by running az bicep upgrade.
Alternative setup instructions can be found here.
VS Code Extension
Although you can author your Bicep templates using whichever editor you prefer, VS Code has a great extension that will make this process much easier.

This extension includes the following features:
- template validation
- snippets for resource types (e.g. blob storage, app service, etc)
- intellisense for allowed field values
- symbol navigation
- document outline
- refactoring
Basics
Now you're ready to roll. Let's write our first Bicep template! 💪
Simple Bicep Script
To dip our toes in the water, we'll create a Bicep script to provision an Azure Storage Account.
From within VS Code create a new file called main.bicep. In this file type res-stor and if you've got the extension installed you'll get intellisense showing a bunch of snippets for resources you can create.
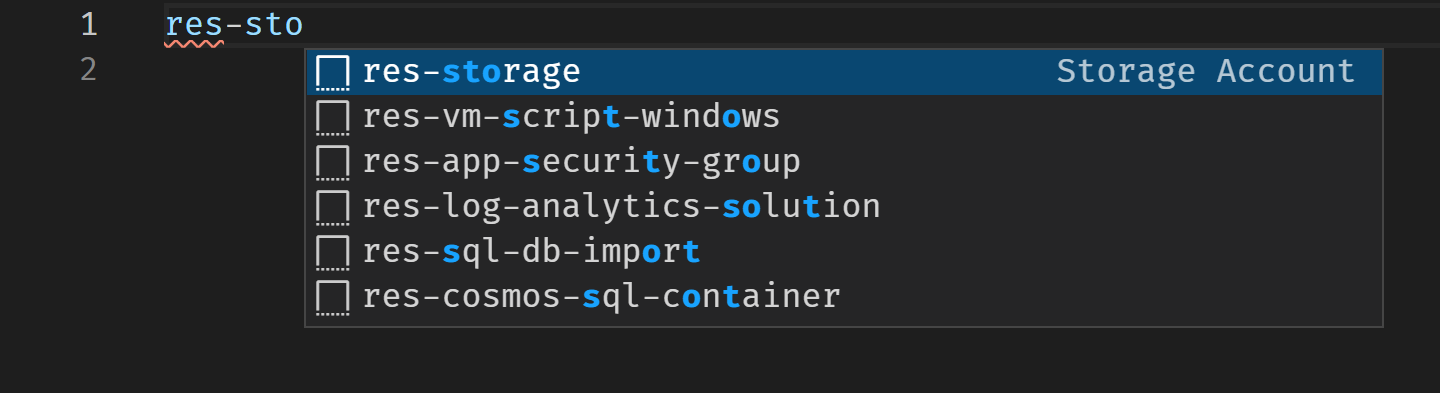
Select res-storage and a resource template will be scaffolded for you:
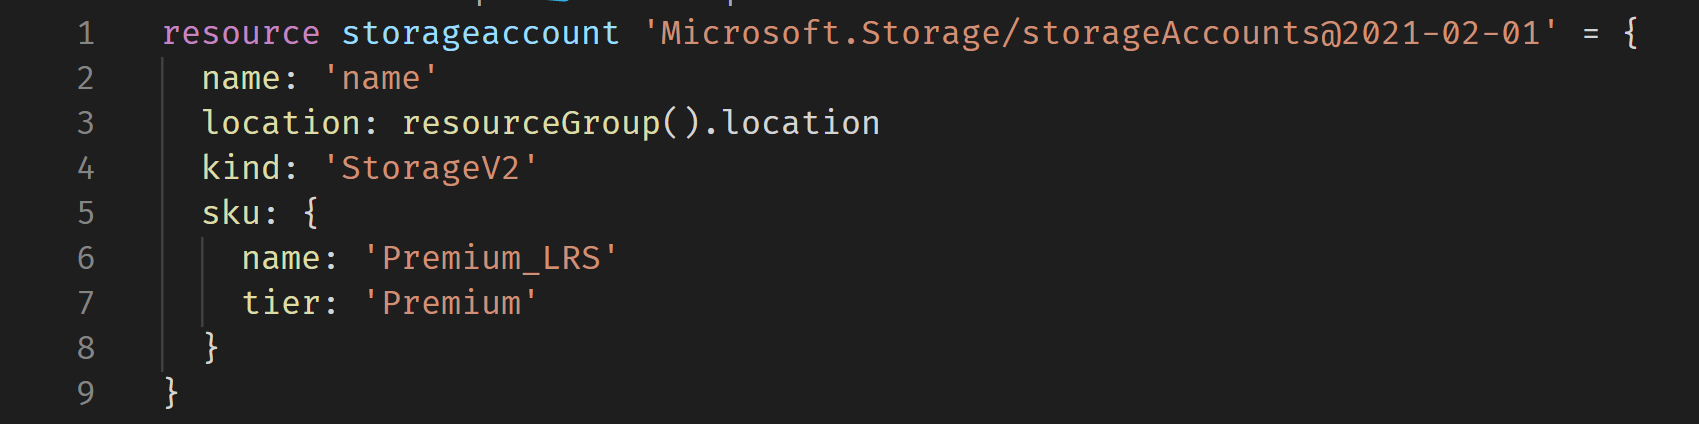
Let's walk through what we're seeing here. resource is a keyword which tells Bicep that we are defining resource. storageaccount is symbol that represents the resource. You can use this as a reference in dependent resources, or to access it's properties. Microsoft.Storage/storageAccounts@2021-02-01 defines the type of the resource. The date on the end is the version of the API that we'll use to create the resource. name is the resource name that will be displayed in Azure. location is the resource group. By specifying resourceGroup().location we are telling bicep to use the same location as the resource group that our storage account is being deployed into (more on that later). kind is the type of resource group we are creating. StorageV2 is a common general-purpose storage account, but we could also change this to create a block blob storage, or file storage. sku is the tier we are using. We can use this to select standard or premium, or redundancy options like LRS (Locally Redundant Storage), GRS (Geographically Redundant Storage), ZRS (Zone Redundant Storage), and more. There are many more properties that can be set, but these are the minimal so all others will be set to the defaults (e.g. access tier will default to 'Hot').
With a few tweaks to this template, we end up with:
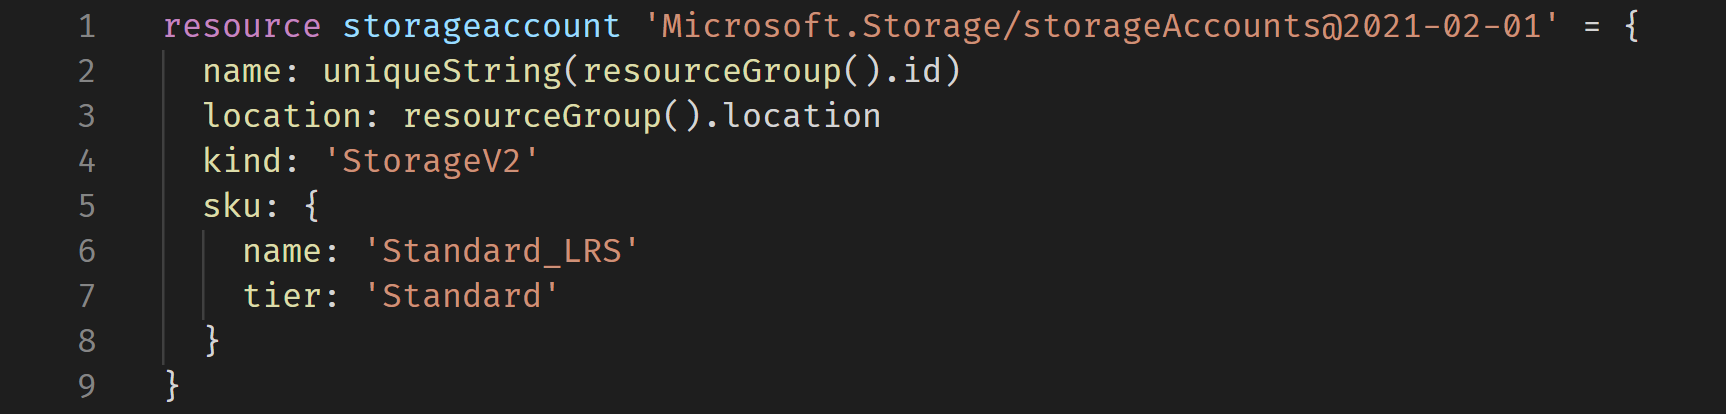
Besides changing the sku, you'll also notice that the name has changed to be a function. Although we can name our resource anything we long (provided it's a valid storage account name), for demo purposes we can use uniqueString(resourceGroup().id) to generate a unique name within our resource group. It will always resolve to the same name, if we continue deploying into the same resource group. Quite handy for demo purposes. 😎
Executing via CLI
Now that we have a simple Bicep script, lets deploy to Azure! There are a several steps needed to do this.
1. Ensure you are logged in via Azure CLI
az login
2. Set the correct subscription
az account set --subscription [name or ID]
Note: you can see what subscriptions you have access to by running
az account list
3. Create the Resource Group
az group create --location australiaeast --resource-group bicep-blog-rg
4. Create the Resource
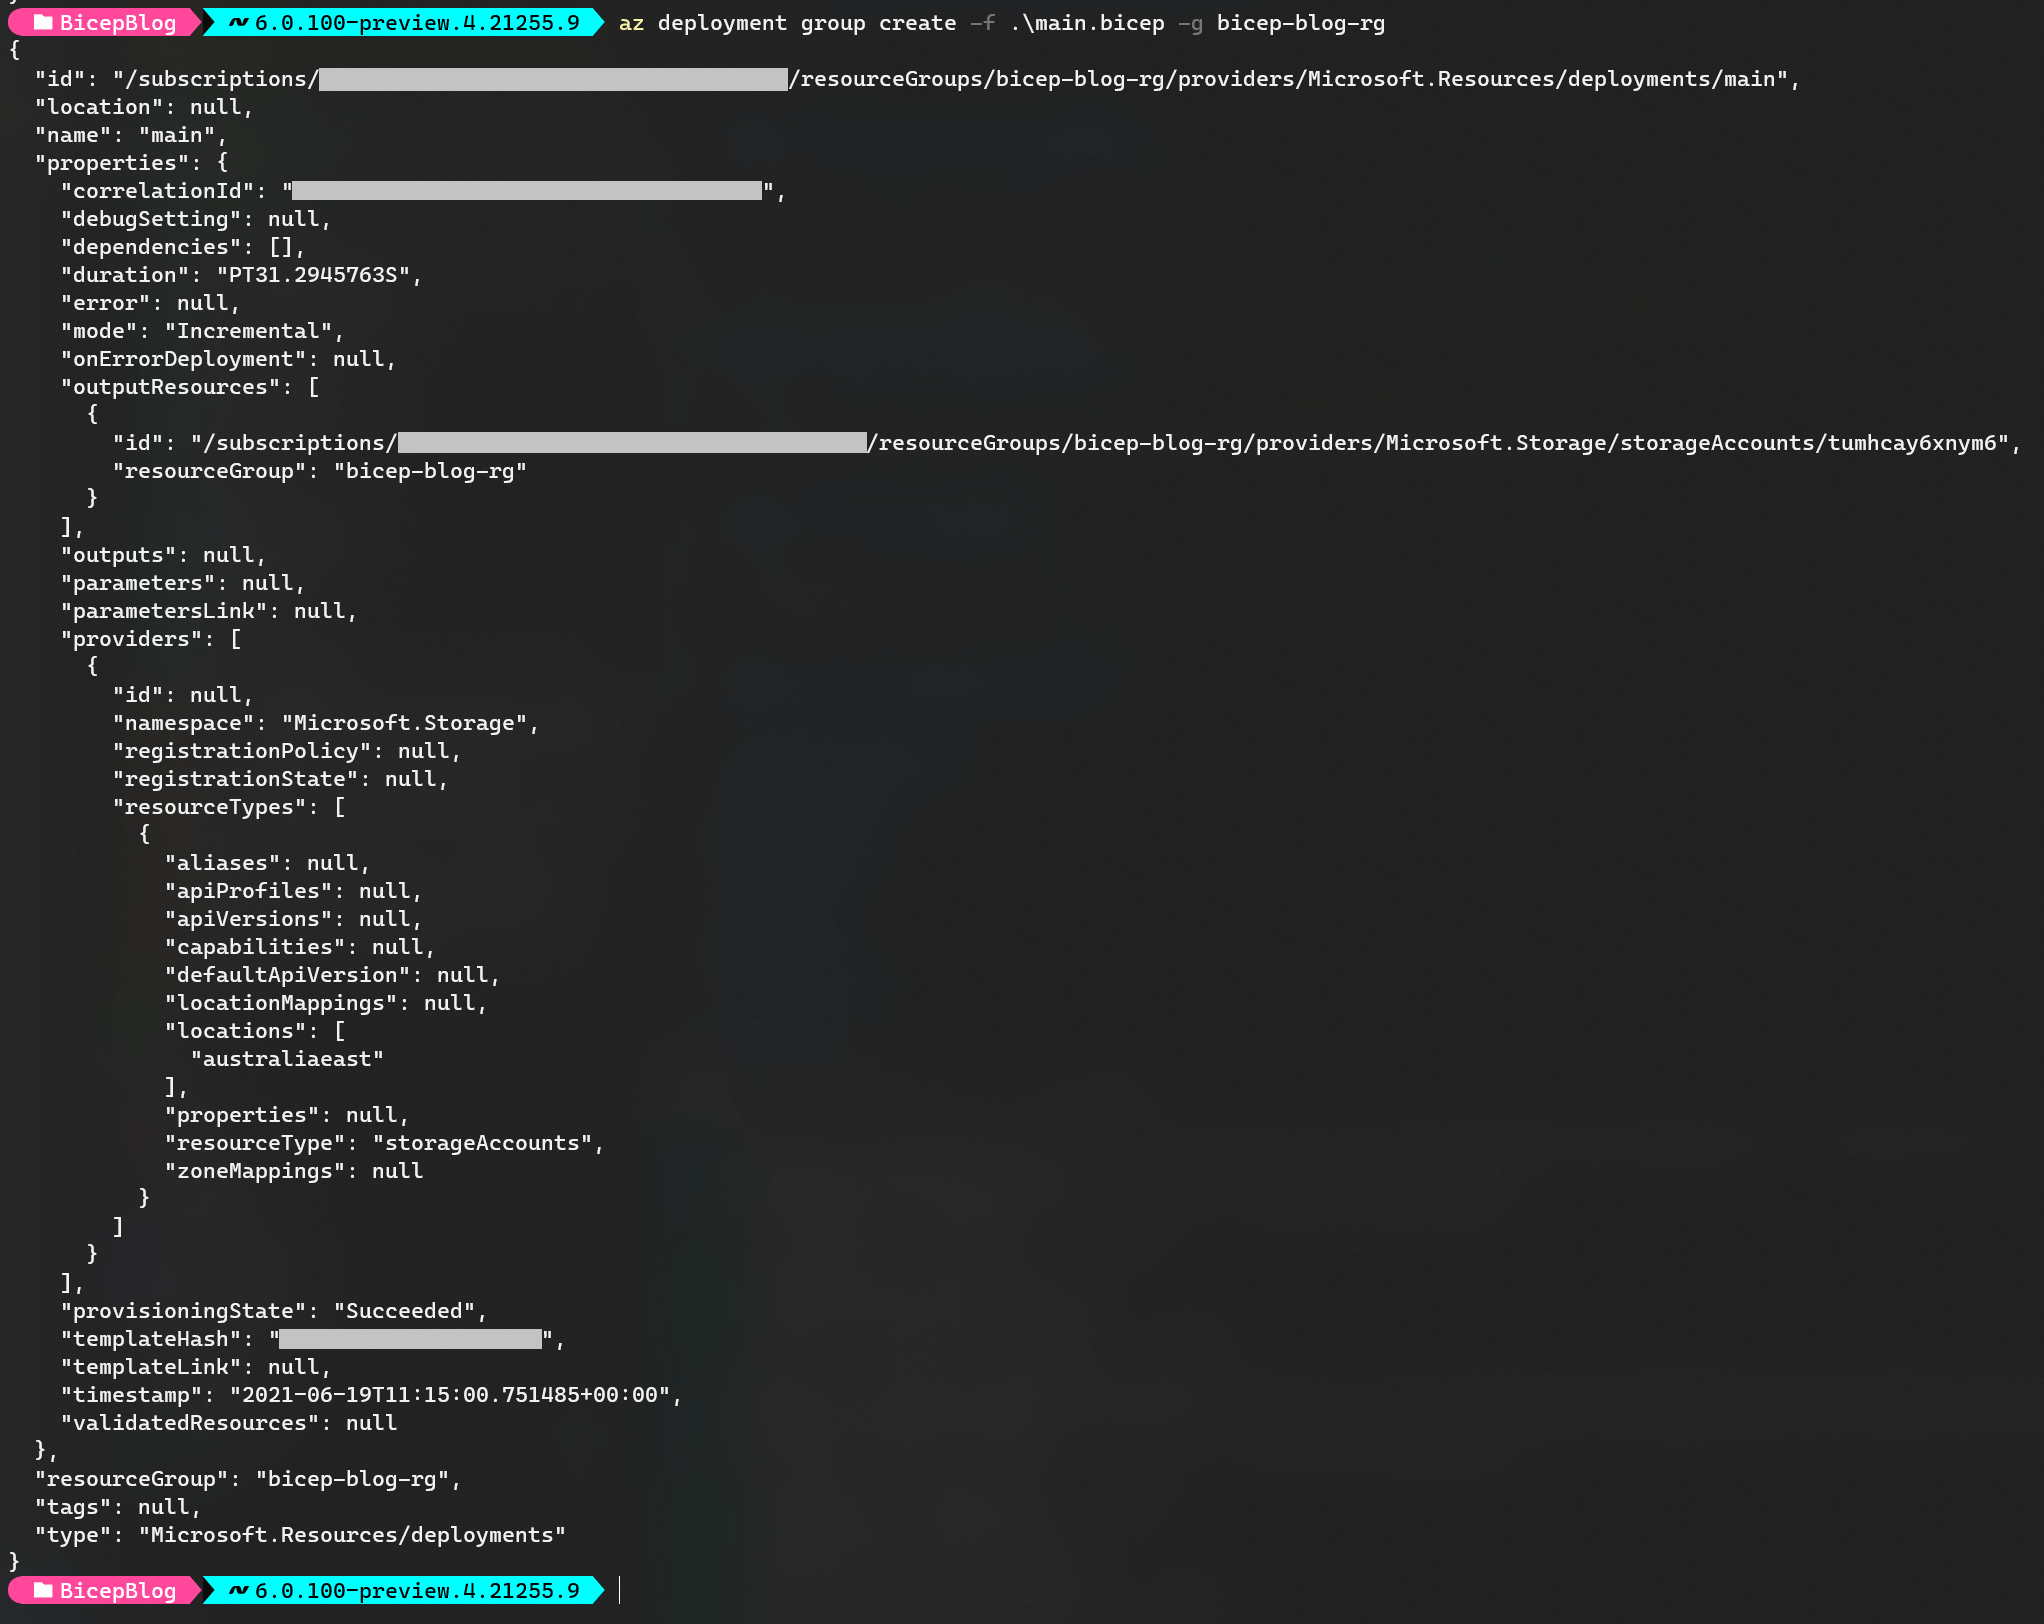
az deployment group create -f .\main.bicep -g bicep-blog-rg
5. Confirm Resource Creation
If all has gone well, you'll see a blob of JSON returned which looks something like:
What Can't Bicep Do?
Bicep will help you to provision resources in Azure however, it won't help you to deploy your application on top of the infrastructure. You'll still have to do that via your favourite DevOps pipeline. Also as Bicep is built on top of ARM templates, it will only work on Azure. If you have a need to deploy to another cloud or multi-cloud environment, you may need to look into something like Terraform instead.
Summary
After an intro what Bicep is and what it does, I've walked through how to get setup, create a basic template, and deploy it to Azure via the CLI. Hopefully I've convinced you as to why this is a good idea, and you also see how easy this is, especially compared to authoring ARM templates.
We've only just scratched the surface here. There is so much more that Bicep can do. For more advanced Bicep concepts and features see part 2.
Go forth and flex your Biceps! 💪